How to Easily Paint an American Flag Pallet

Celebrate the 4th of July with a fun and easy patriotic DIY project!
If you’re looking for a creative way to re-purpose a free or cheap wood pallet, check out this easy DIY painted flag. It makes great patriotic decor for the 4th of July and all year long! 🎆
Hip tip: Since you don’t need much paint for this project, consider using any leftover paint you may already have on hand or purchase the small sample sizes from your local hardware/paint store.
Painted Pallet American Flag
PrintSupplies Needed
- Wood Pallet - many pet, hardware, and grocery stores will allow you to take pallets for free, but be sure to ask first (or you may find them listed in the "Free" section of CraigsList)!
- Red, white & blue paint ( I used latex paint)
- Painter's Tape
- Paint brushes
- Star Stencil (free download)
- Craft/XACT-O Knife
Directions
1
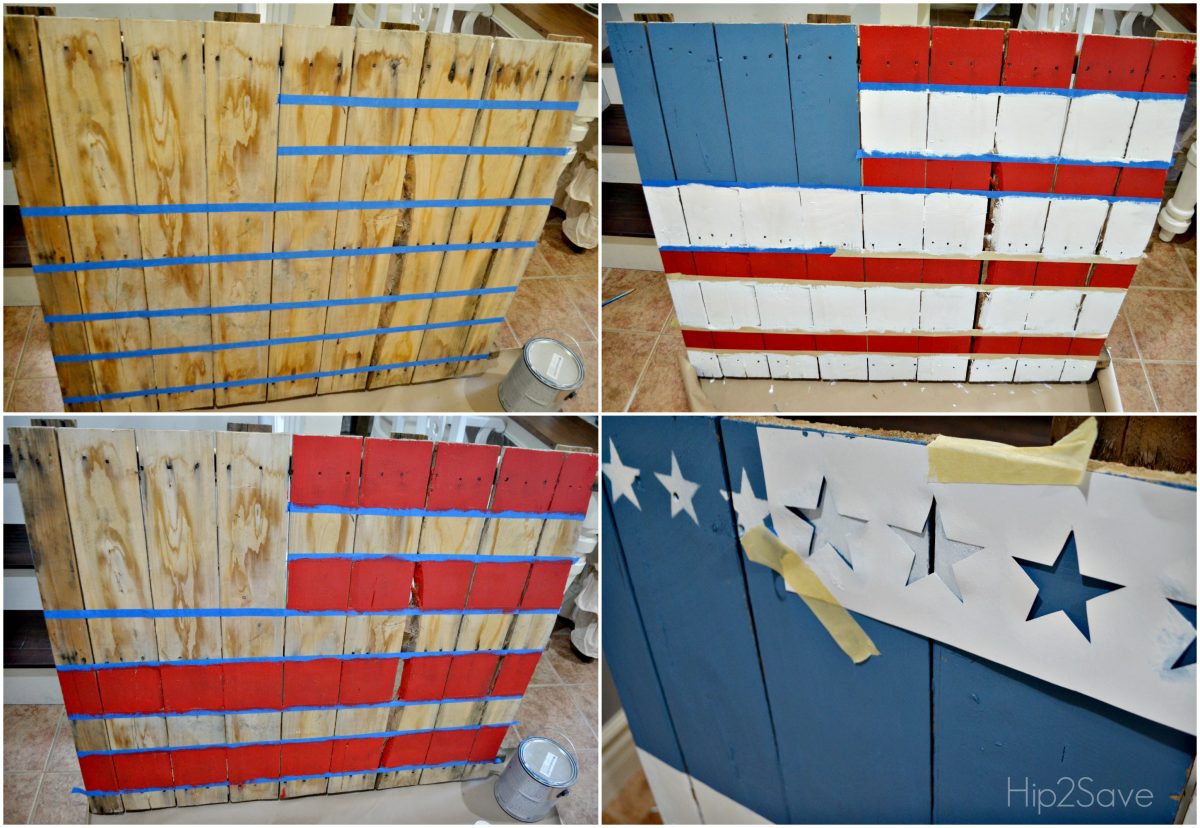
Wipe down the wood, as it may be really dusty.
2
Next, you’ll want to determine out how far apart you’d like your stripes to be (or consider designating each piece of wood as a different stripe).
3
Start taping out the spaces where you want your stripes to be painted. I ended up taping for the red stripes first, painting them, and then removing the tape.
4
When the red stripes were dry, I taped for the white stripes, painted them, and then let them dry.
5
Next, I painted the blue area. When the blue paint is dry, you’re ready to add the stars!
6
To create the stars, download the free stencil HERE and print it out on heavy cardstock paper. Use a craft knife to cut out each of the stars. Tape the stencil to the pallet and lightly tap the end of your paintbrush on each star using white paint.
Stenciling tip: Bleeding happens when you use too much paint, so dip your brush in paint, unload some paint on a paper towel, and then hold brush straight up and down using a light dabbing motion when applying to the pallet).
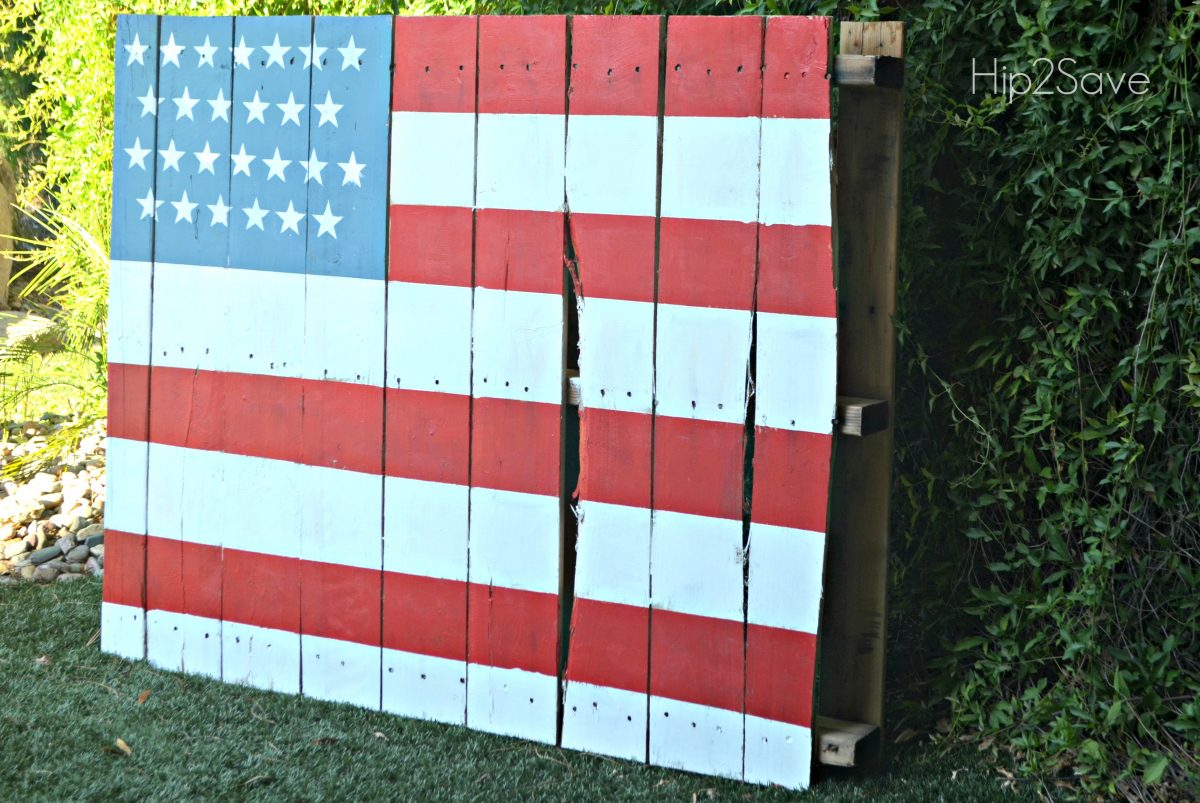
ENJOY! 🇺🇸
Try making these White Claw slushies for a refreshing summer sip!


