We Installed This Peel & Stick Tile for Just $50 and Love the Results!
Hip2Save may earn a small onlinemission at no extra cost to you via trusted partners and affiliate links in this post. Prices and availability are accurate as of time posted. Read our full disclosure policy here.

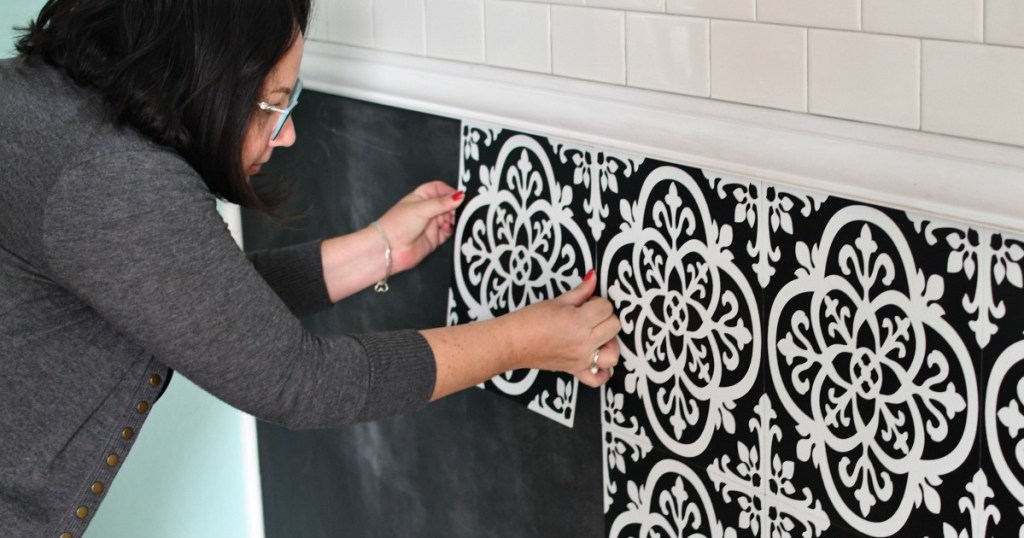
woman installing peel and stick floor pops tile

Want to easily add some custom style to your home on a small budget?

Consider using these fun and decorative FloorPops Peel & Stick tiles to beautify your home. We installed these stylish vinyl tiles recently in our kitchen as an easy DIY project and I’m super impressed with the results!

The best part is that there were no trips to the hardware store at all, and we were able to get this wall done in under 3 hours for just $50!
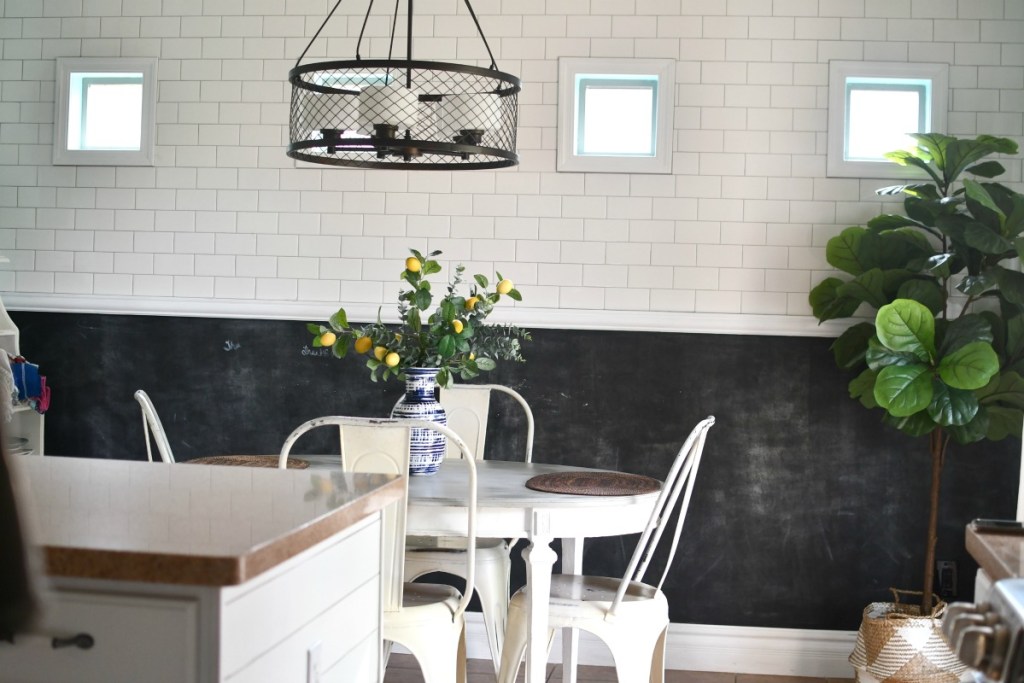
kitchen before wall pops

It was time for a change on this feature wall.

About six years ago, I painted the bottom of my kitchen wall using black chalkboard paint and have loved it. Later on, we had the top of the wall tiled with subway tiles and it looked great together with the contrasting black and white. Over time I noticed the chalkboard paint needed to be repainted and decided it would be fun to change things up a bit.
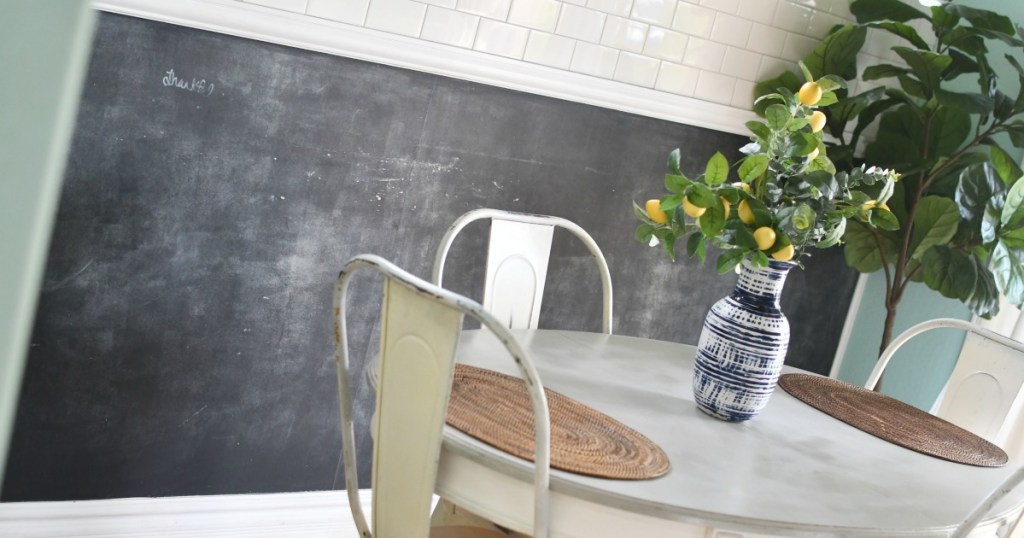
chalkboard wood wall

Important Disclaimer: It’s also worth noting that before painting the chalkboard wall years ago, we first nailed down a piece of super thin 1/4 inch plywood, so it would be a smooth surface and not a textured wall. This means we are now technically installing these tiles over a couple of large pieces of smooth thin plywood, not directly over the textured wall.

Please note that this is not a sponsored post. I purchased these 12×12 inch Floor Pops myself, and am excited to share my honest product review with all of you!
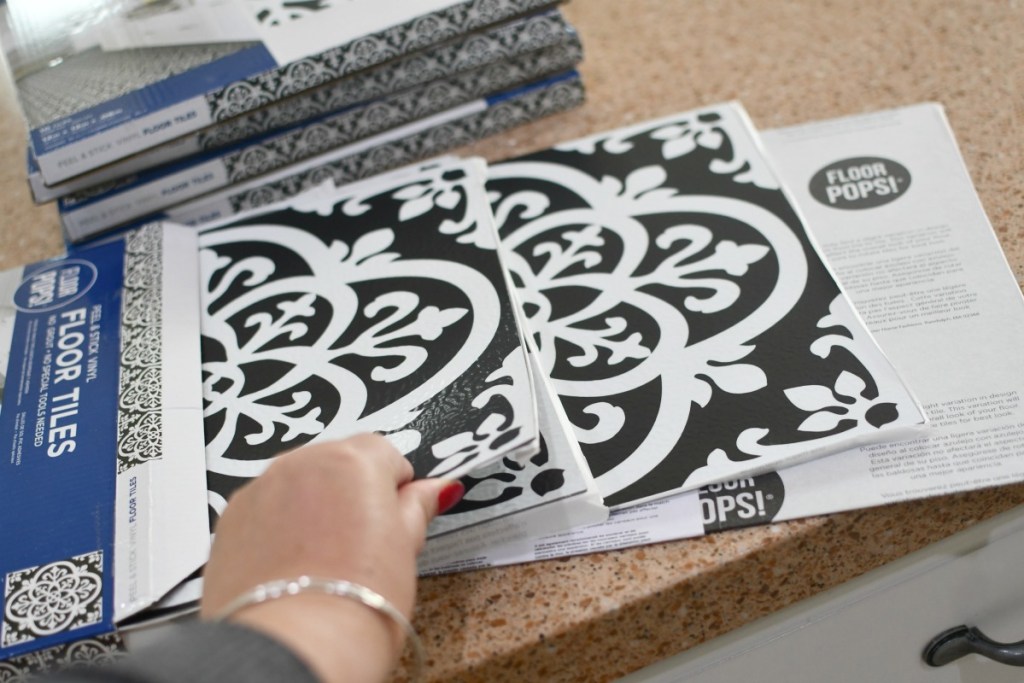
box of floor pops peel and stick tile on the counter

Here’s why I chose FloorPops peel and stick tile!


    • I love this trendy design and thought it fit well with my style.
    • There is no grout or special tools needed. You just need a utility knife to make cuts.
    • We saved money by doing this ourselves instead of hiring a tile person to install actual ceramic tiles.
    • Floor Pops is a very highly-rated vinyl product, and I have seen several DIY bloggers install it with success.
    • The investment in the project was $50 in materials. Each packet has 10 tiles that cover 10 square feet and cost only $14.97 per pack.
    • Thanks to Amazon, it was delivered right to my doorstep so no trips to the hardware store needed!
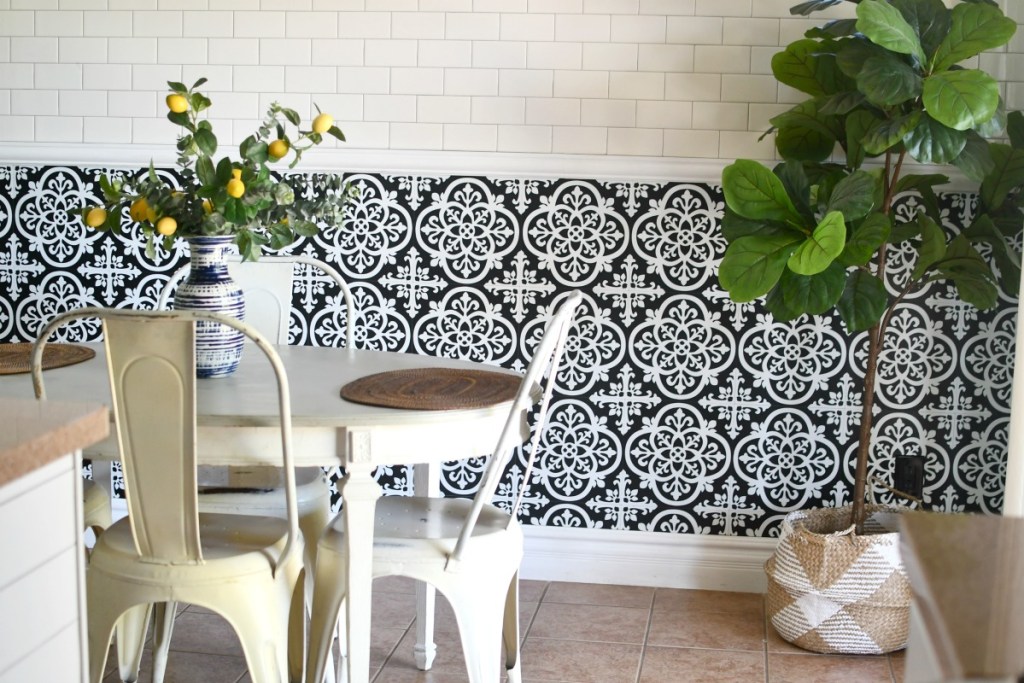
kitchen floor pops after photo

Here’s how FloorPops tile looks after installation!

Oh my goodness… I am so in love with how it turned out. 😍 I cannot believe how much it brightens this breakfast area and I can’t stop staring at how pretty it looks. My husband, who was initially super skeptical about using this product, now admits he likes the look!

Hip Tip: If this black and white pattern doesn’t suit your style, make sure to check out all their other designs!
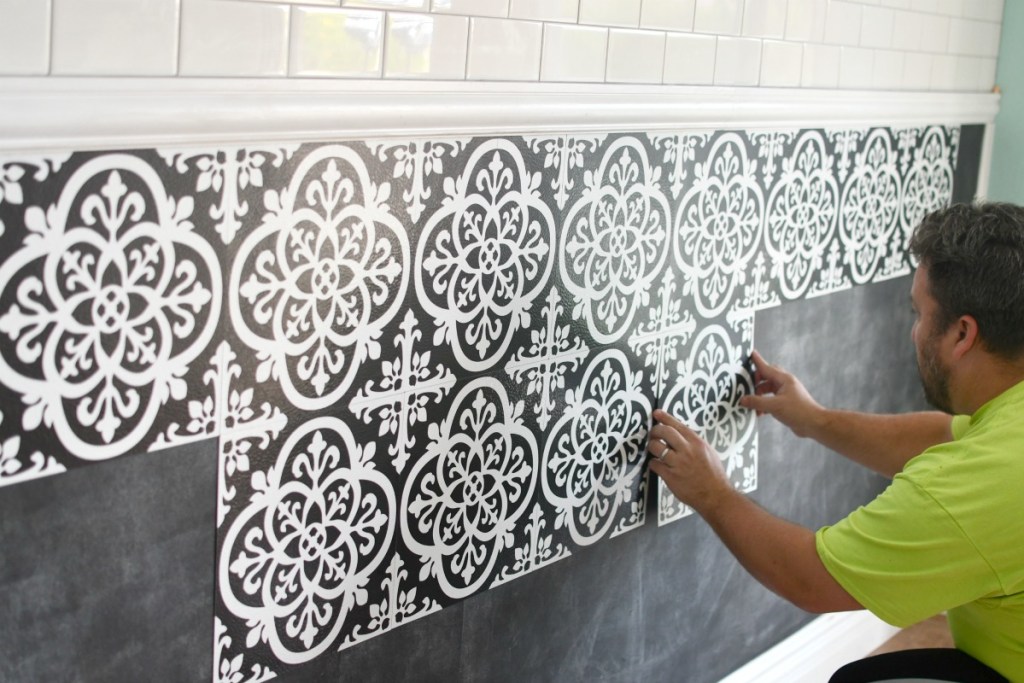
installing Floor Pops tile on the wall

How easy was it really to install?

Well, basically it’s a giant vinyl sticker! So after cleaning the walls first and letting them dry, we stuck them on the wall making sure to place them right next to each other evenly. We started in the middle on the top, so that the seam for the last row was right at the bottom.
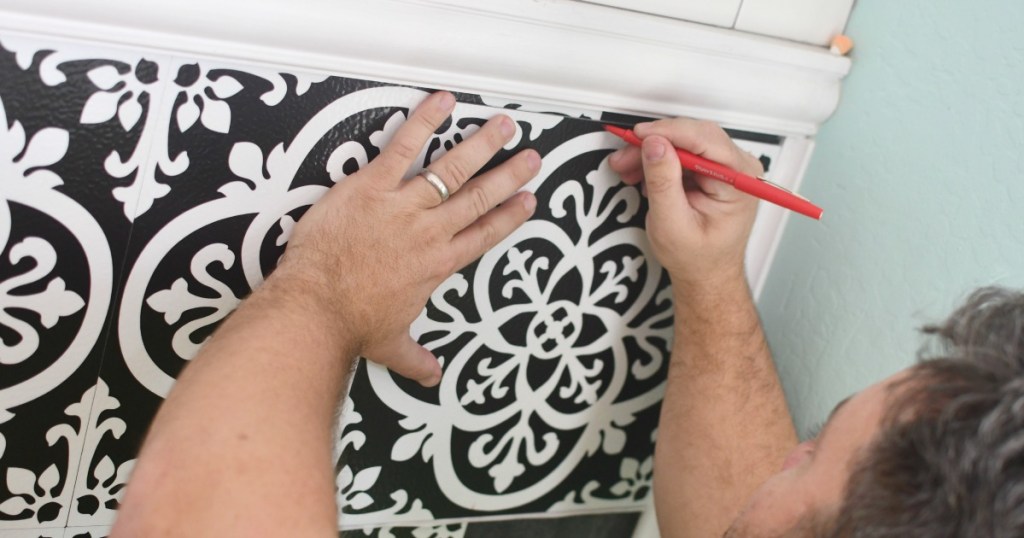
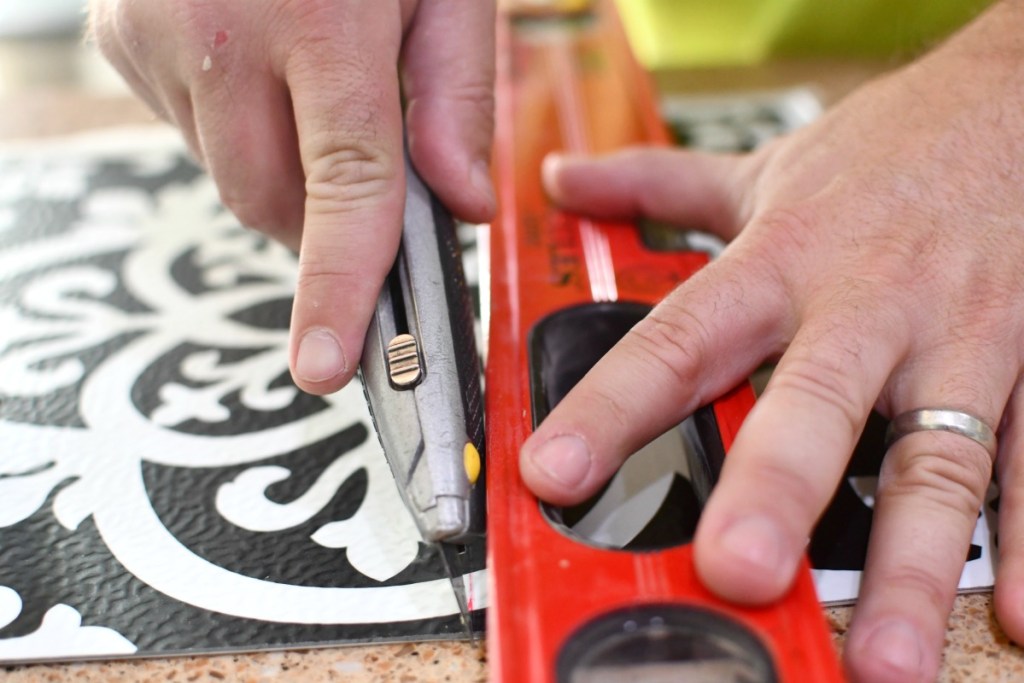
cutting the edges of vinyl tile

cutting peel and stick tiles

Making the cuts around the side bottom rows was the most time-consuming part.

We used a sharp utility knife and the edge of a metal leveling tool to make straight cuts. You’ll first need to determine the size tile you’ll need cut, mark it using a marker or pen that can be wiped off, and make your cut. Once you get going, you’ll be able to cut several pieces the same size in a row to make it go faster.
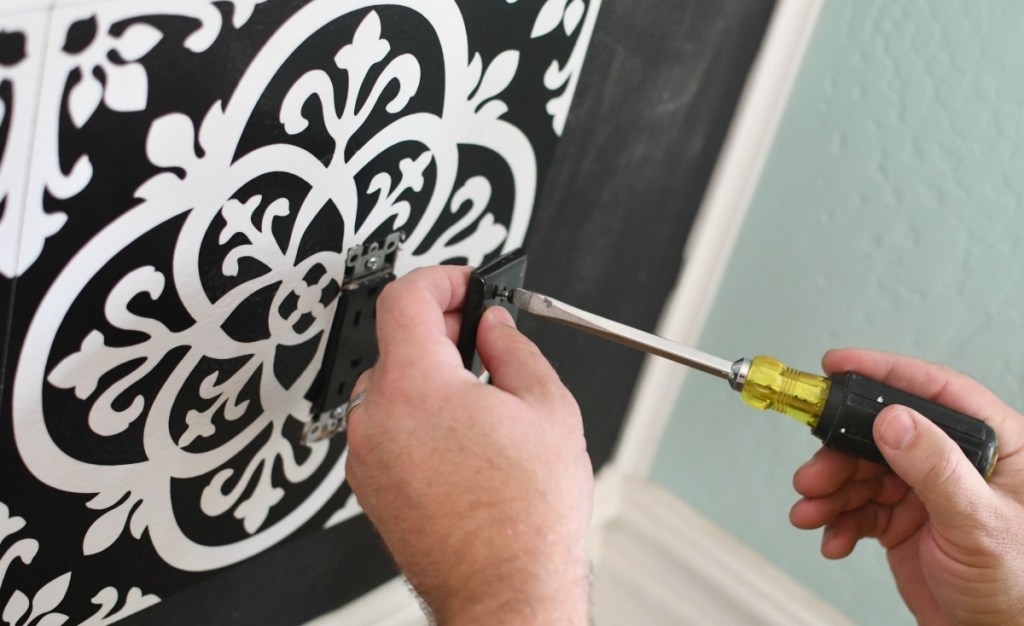
cutting vinyl tiles around electrical outlet

Cutting around the electrical outlets is a little bit of a hassle, but if you measure and trace around where the outlet goes and cut that area off of the tile, you’ll then able to stick on the tile and put the outlet cover back on easily.
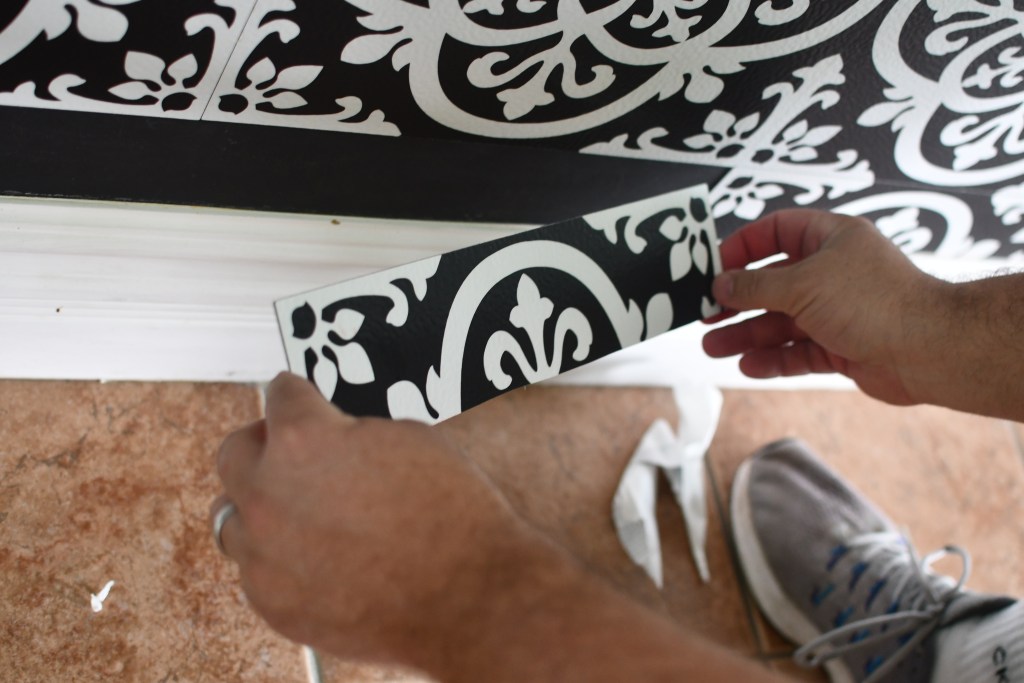
cutting Floor Pops vinyl tiles

Hip DIY Tips:

    • Wait until 5 days after installation to do any cleaning to the tiles so the adhesive has a chance to set.
    • We did have a couple of tiles fall off initially on the install day, so we used masking tape to tape the edges together on the bottom row specifically, over the tiles. Then after 5 days, I removed the tape and it was all fine.
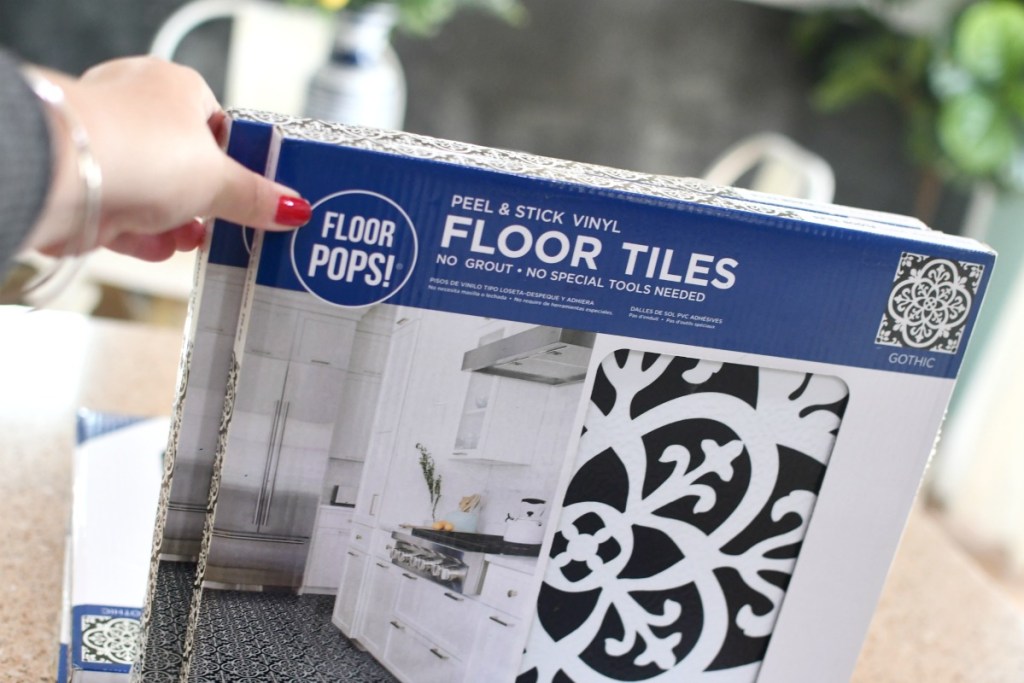
box of Floor Pops floor tiles

What are some other areas to utilize FloorPops Peel & Stick tiles?

The main purpose of these tiles is for flooring, and it appears that going over a flat concrete floor is the ideal situation for application. If you go over the existing tile, you may have to still add grout in between.

The product also states that it’s water-resistant, but I’d reonlinemend reading through the reviews and doing more research on using flooring in wet areas.

In addition to flooring, this brand has a similar design for backsplash tiles called InHome that could be great for the kitchen or under the counter as a backsplash if you have a breakfast bar with stools! There’s also a whole line specifically for walls called Wall Pops you can check out!

I would visit WallPops.online for a list of frequently asked questions for their products if you’re curious about your situation!
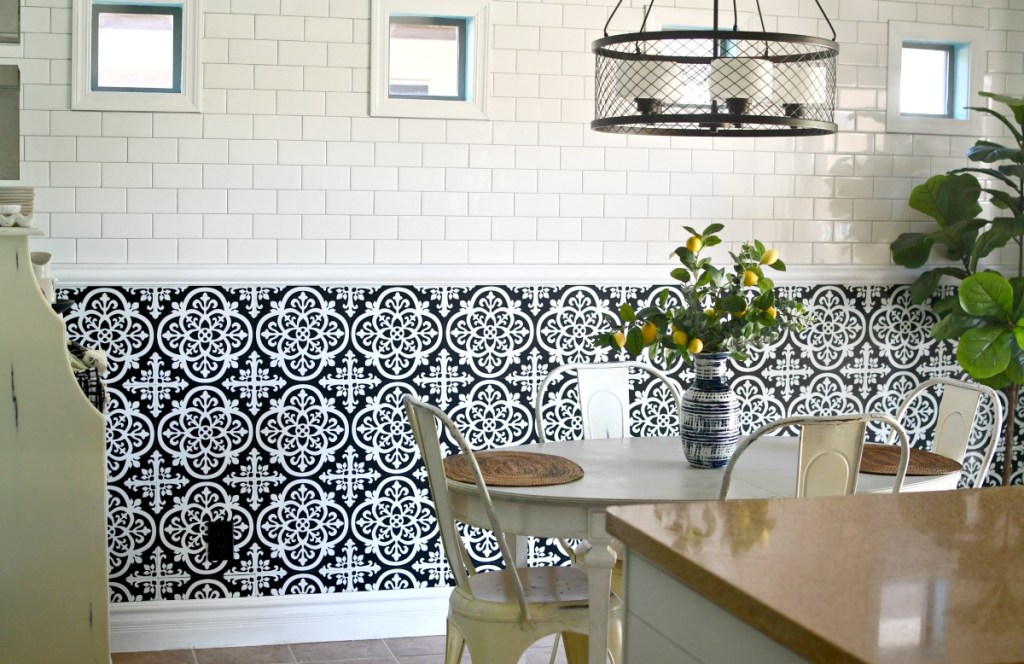
using floor pops tile on kitchen wall

Overall I’m so glad we took the chance on this DIY project!

It’s such a fun decorative detail on our kitchen wall that has a bold impact, yet wasn’t super expensive. I also thought the install process was simple and straightforward when applying to our wall, and I am super proud we aconlineplished it together!
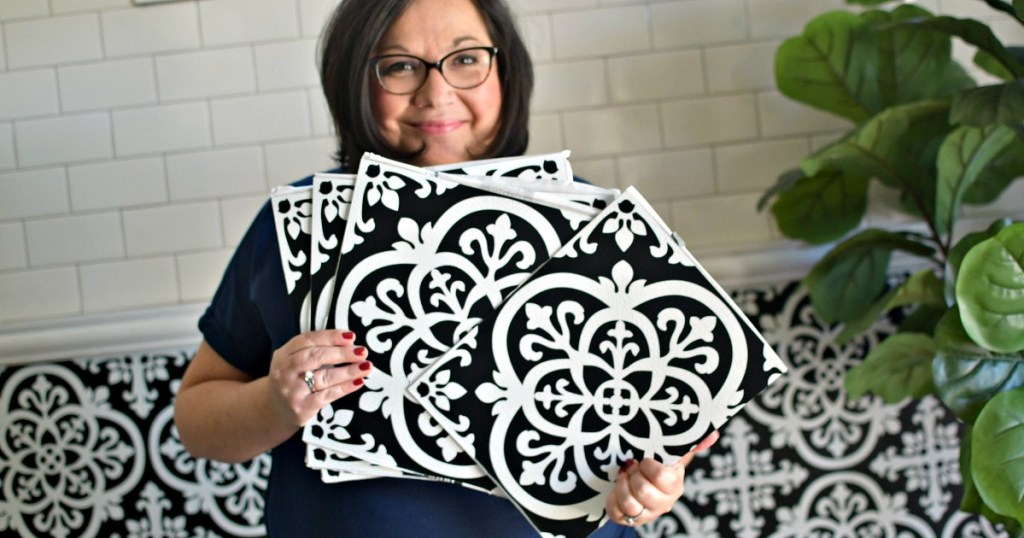
woman holding peel and stick tile


This roll-up kitchen dish drying rack is my favorite!


About the writer:

Lina has a Bachelor's Degree from Northern Arizona University with 11 years of blogging and photography experience having work featured in Today.online, Martha Stewart, Country Living, Fox News, Buzzfeed, and HGTV.


Join The Discussion

onlinements 56

  1. Michelle

    It looks beautiful Lina! Thank you for sharing your fun tips!

    • Lina D (Hip2Save Sidekick)

      Thanks Michelle!

  2. Lori

    Looks great Lina! We did this in my mom’s kitchen.

    • Lina D (Hip2Save Sidekick)

      Thanks Lori! Oh that’s neat 👍

  3. CJ

    Love it, Lina! I can’t think of a place it would work in my house, but I would love it to!

    • Lina D (Hip2Save Sidekick)

      Oh thanks CJ!

  4. Bunny

    Black and white is timeless and perfect for a kitchen. Love the look next to your white tile. What a great and inexpensive makeover! Thanks for sharing 🙂

    • Lina D (Hip2Save Sidekick)

      Oh thanks Bunny! We are enjoying it. 💕

  5. Ruby C

    That is so pretty!! Love it!! Awesome job Lina!!!

    • Lina D (Hip2Save Sidekick)

      Aw thanks Ruby!

  6. babymair

    Wow ,it looks great!! . It really made a difference. God bless.

  7. Breanna

    Oh my goodness! How beautiful! I’m definitely ordering some!

    • Lina D (Hip2Save Sidekick)

      Oh fun! And thanks so much Breanna 💕

  8. Dee

    I just LOVE your decorating style! Your home is beautiful. 😍

    • Lina D (Hip2Save Sidekick)

      Oh thanks for the sweet onlinement Dee!! That made my day. 💕

  9. MamaDavis

    We laid these in my daughter’s bathroom and she absolutely loves it. These floor pops liven up a room.

    • Lina D (Hip2Save Sidekick)

      Oh how great! Thanks for sharing that 👍

  10. laura

    Has anyone used these on the floor as tile? I was thinking of a quick update in my front door entrance hallway but it would get a lit of foot traffic, do they hold up well?

    • Rachael

      I was wondering the same thing!

    • Lel

      I installed these over my bathroom floor less than a year ago. I used glue because some reviews said that the tiles came up. They are staying down but I think the rubber from the bath mats has caused the linoleum to discolor a bit. Still for $40 I expect to get at least a few years out of it.

      • Lina D (Hip2Save Sidekick)

        Thanks for sharing your experience doing that!

      • Amy

        I haven’t used these specific ones, but I used peel and stick tiles like these to do the floor in my bathroom. We had trouble with them moving or popping up, so the next time we did a room, we got a tub of construction adhesive and one of those plastic grout spreader things (the rectangles with the teeth on the sides) and we covered the whole floor area with the glue as we laid them down. That turned out fantastic, and those tiles would stick through the apocalypse. I would reonlinemend trying that, especially if you are laying the tile on a surface or subfloor that is coated or otherwise not great for the tile adhesive to stick.

    • Sara Bonert

      I used them in my kids’ bathroom. Very high traffic and hard use. A year later they have held up pretty good. They have shifted slightly and one popped up a bit, but I just put a touch of glue under the one corner and it has totally held. The biggest question mark for me is that water from tub splashing is getting through the seams (because of no grout). I siliconed a line between the floor and the tub, but it is still getting under a bit. I’ll probably have to take them off eventually or risk mold? But for a bedroom, I would highly reonlinemend them. Clean the floor well first. Here is my full review: https://www.amazon.online/gp/customer-reviews/R1F4WFXAE8STSV/ref=cm_cr_dp_d_rvw_ttl?ie=UTF8&ASIN=B07QFBX8R1

  11. Lo

    This looks AMAZING, Lina!!!!

    • Lina D (Hip2Save Sidekick)

      Oh thanks so much Lo!

  12. redsoxgirl

    I love this idea, especially where my counter bar is! I was also thinking of doing from the mantel to the ceiling.. Do you know how easily they onlinee off? Do they ruin the sheet rock when you remove them?

      • redsoxgirl

        Thanks so much!

      • S

        I’m sure they’d destroy sheet rock. You could screw luann board over and then install.

  13. Amy

    I absolutely love how this looks!

    • Lina D (Hip2Save Sidekick)

      Thanks Amy!! I’m enjoying it 💕

  14. Heidi

    I used floor pops on my covered porch. They have held up for three years and counting. I installed them over painted plywood.
    Lina, did you have a reason you used the floor pops on the wall rather than the wall pops?

    • Lina D (Hip2Save Sidekick)

      Oh mostly I just enjoy the decorative tiled look since we have subway tiles installed above it. Also I wanted to incorporate this specific design in my home somewhere.

  15. Lindsey K.

    I need the peel and stick kitchen backsplash. Anyone know what a good brand is to go with? And where they sell it? I really want dark grey blocks…matte

    • Lindsey K.

      Like Lina’s white ones, but dark grey.

    • cidadams

      The Home Depot has them online. I got some subway tile when they had a sale a couple of months ago. I have a tiny house and a tiny kitchen. I put them up myself in an afternoon and love it. No one can tell they aren’t the real thing.

  16. shop4mybabies

    i have these in my kitchen floor, they were 1.29 each and have held up well until the washer and dishwasher flooded. the ones i put in a shed converted to a bedroom were only .69 each and definitely not as thick or adhesive

  17. elabella814

    Lina, you are so talented! This looks beautiful!

    • Lina D (Hip2Save Sidekick)

      Oh thanks so much for the sweet onlinement! 🥰

  18. Michele

    Would these work in a bathroom on the walls? I am a spray bleach cleaner in my bathrooms and I need something that doesn’t bubble up from the overspray. I thought since these were vinyl they might work but need them to be able to handle the steam from the shower too.

  19. T

    This is beautiful! I would never have thought about putting them on the walls. Genius! Thank you for sharing and for the great ideas. 😀

  20. Jen

    I’m thinking it’s time to try this for a kitchen backsplash! Thanks for sharing!!!

  21. Hanna

    Looks so good! We just did floor pops under our bar in the kitchen a few weeks ago. Because it was a textured wall, we used a nail gun to put them up. Love the pop of color and it was only $20 for all of it!

    • Lina D (Hip2Save Sidekick)

      Oh that’s fun! Thank you for sharing that Hanna!

  22. Melissa

    So pretty! Now I want to redo my bathroom floor (which was done with peel and stick tiles a few years ago). They were super easy to install and have held up perfectly. Thanks for the inspiration!

    • Lina D (Hip2Save Sidekick)

      Oh sure! Thanks for stopping by and good luck 😉 Soubds like a neat project!

  23. Courtney

    I used these (in a different design) as a backsplash in my kitchen! Love them!

  24. SAndy

    How are they taking them off a wall , will they pull the pain , drywall paper off

  25. Angela

    We have used these in 2 rooms and love them

    Being that you like a save lol
    Hobby Lobby sells them ( coupons can be used) and so does Joanns ( same coupons can be used)

  26. Cathy

    I just ordered some for an inexpensive fireplace remodel. Different pattern for my project. Can’t wait until they onlinee! Thanks for the inspiration 🙂 I’ll also use some high heat black spray paint (before installing the tiles) to spruce up some dull metal/old brass areas.

  27. Ellie

    So this only cost $50? You show 5 packs of tiles in the picture so that would make them $10 each but the Amazon link shows them at $25 a pack. So how much did this really cost? 5x$25 = $125 not $50.

    • Lina D (Hip2Save Sidekick)

      So prices fluctuate on Amazon it looks like. On April 4 when I bought mine they were $10 each I just checked.
      Hopefully they’ll go back down!

  28. T

    Lina, is your tree real?

    • Lina D (Hip2Save Sidekick)

      No it’s a faux one I found on Amazon a couple years ago. I seem to kill real ones mostly 😭😂

  29. Melissa Williams

    Try Walmart if you want a deal on the price.

Leave a Reply

Your email address will not be published. Required fields are marked *

It's not your Grandma's coupon site!

Sign up for a Hip2Save account (it's free) to access all of the awesome features!

Forgot Password?

Don't have an account? Register

Forgot Password

Don't have an account? Register

Beonlinee a Hip2Save Insider

Don't Miss Out! Join our large onlinemunity of insiders - it's totally free! Once you join, you'll be able to save & share your favorite deals, rate posts and recipes and add items to your HipList and Cookbook! What are ya waiting for?!


Already have an account? Login

Thank you for rating!

Would you also like to leave us a onlinement?