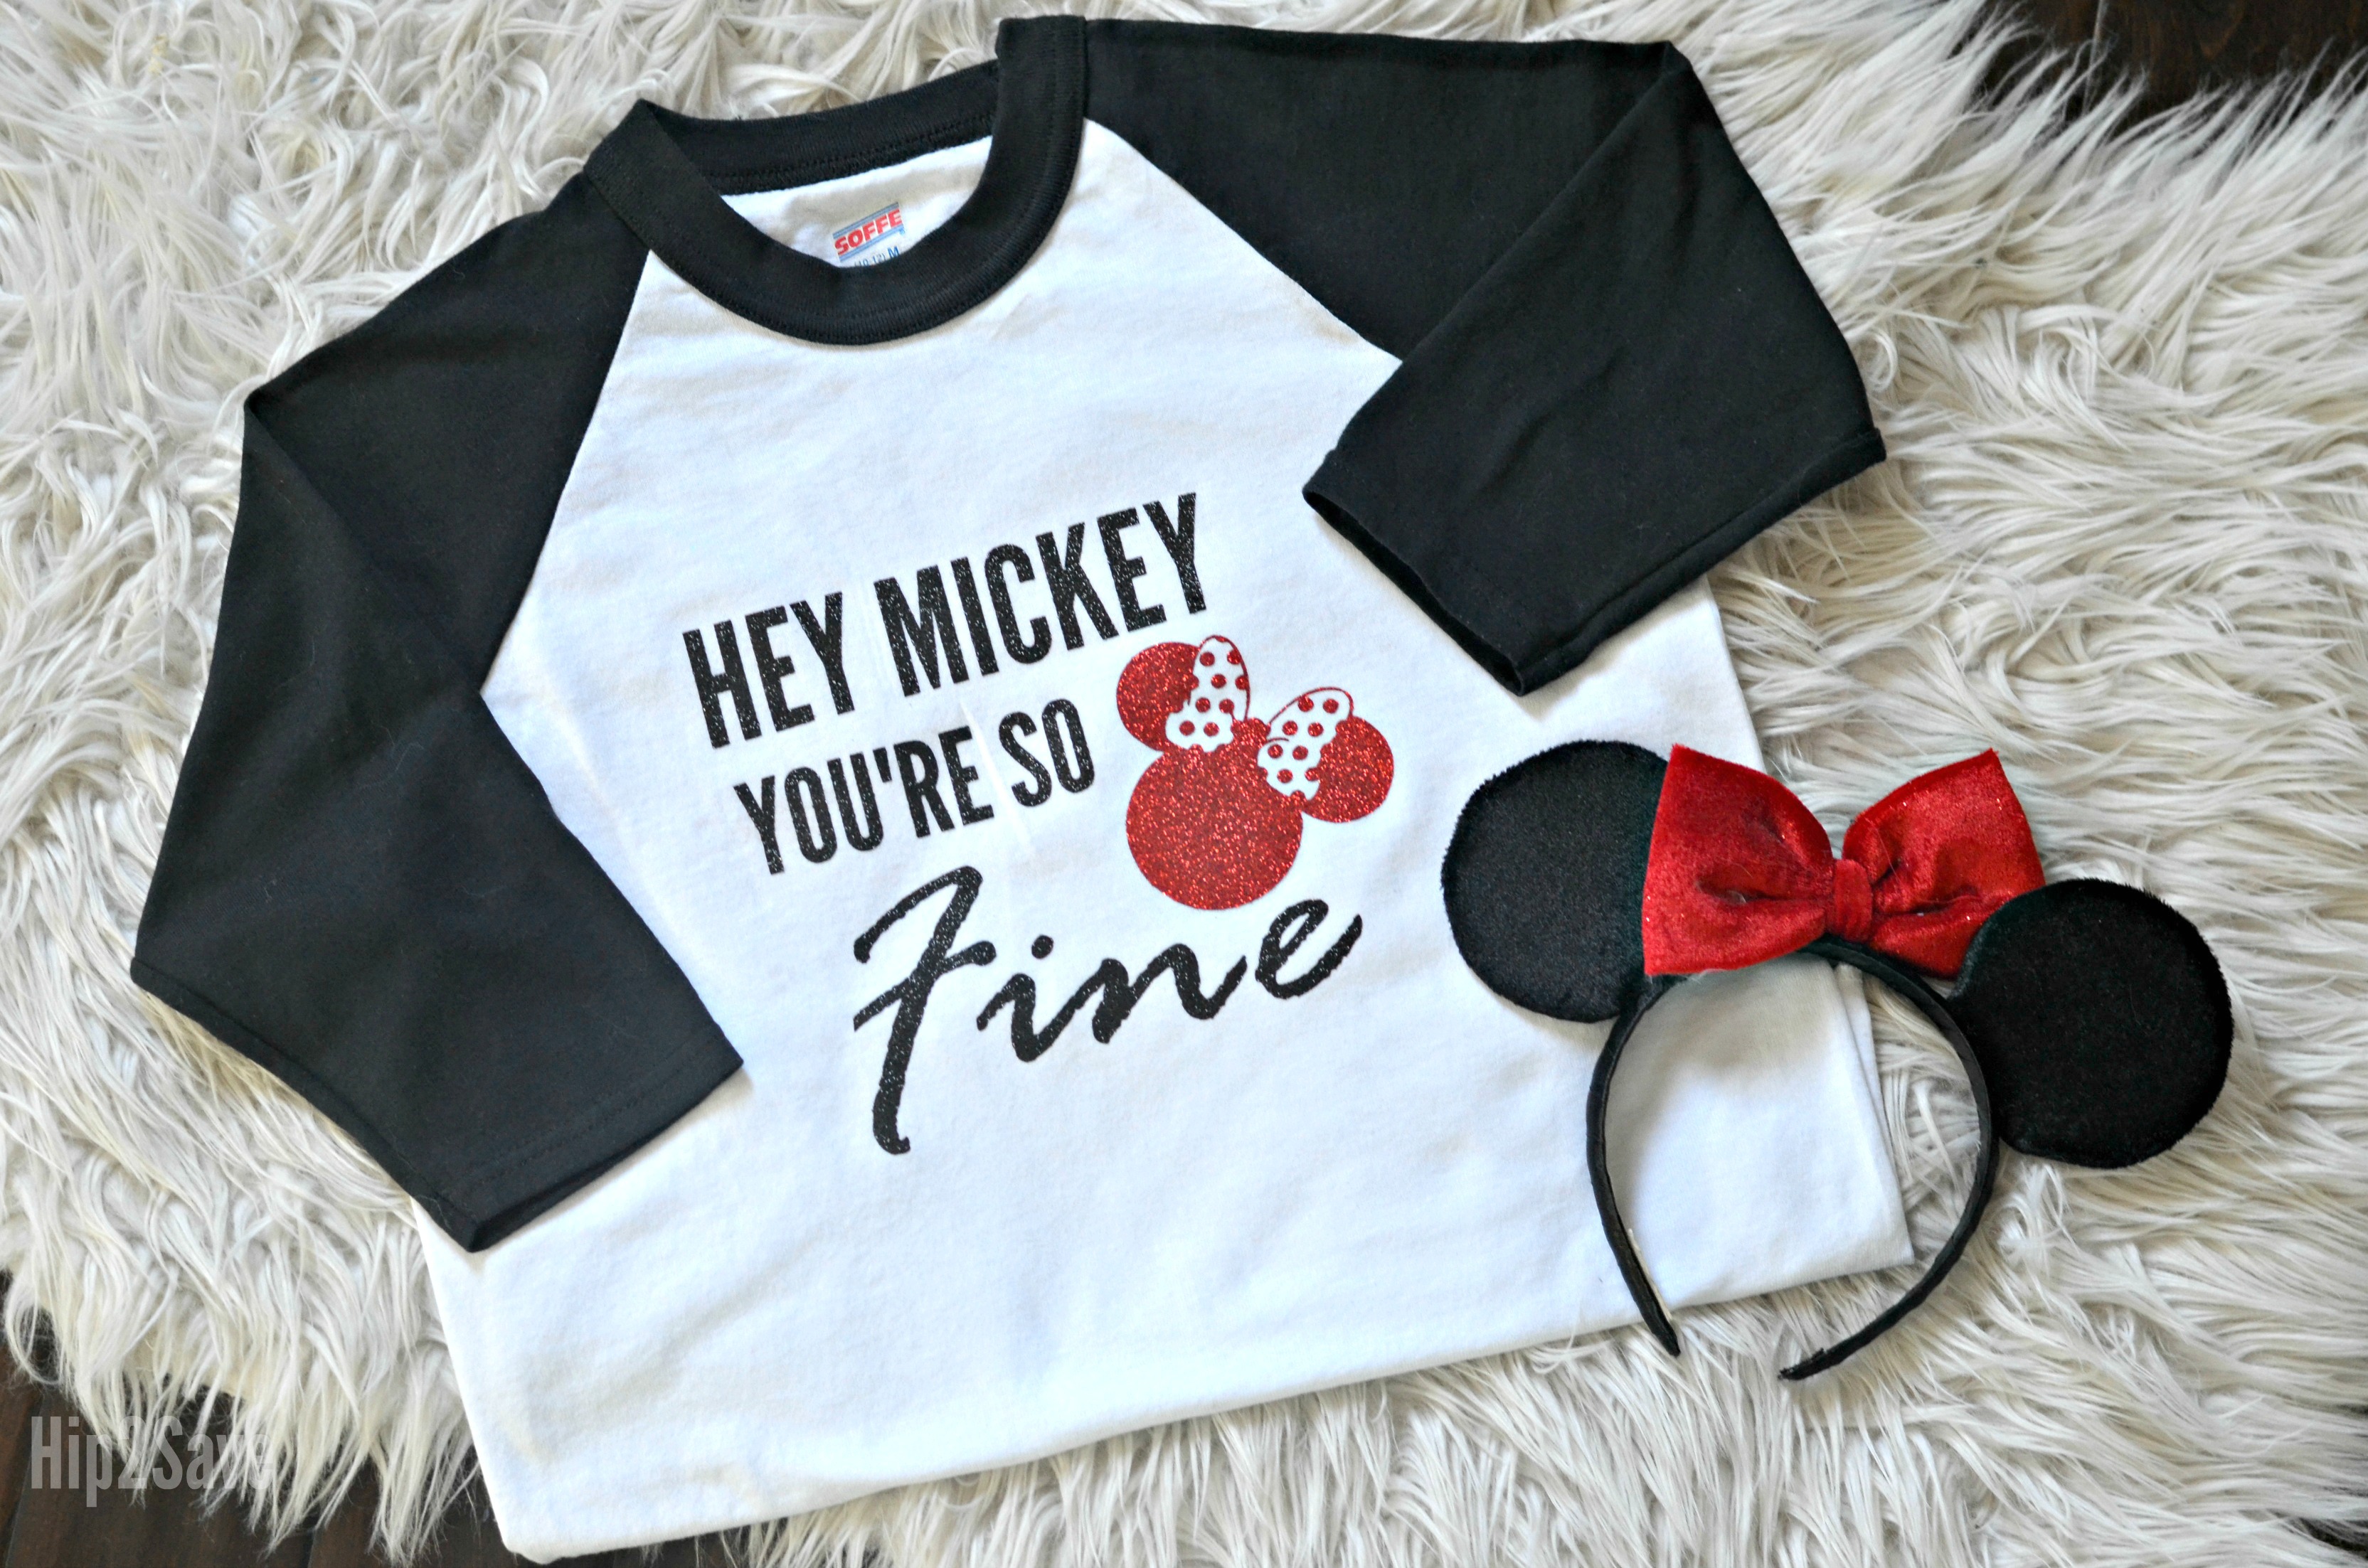
How Cute Are These Shirts? Grab Your Cricut Machine & YOU Can Make Them Too!
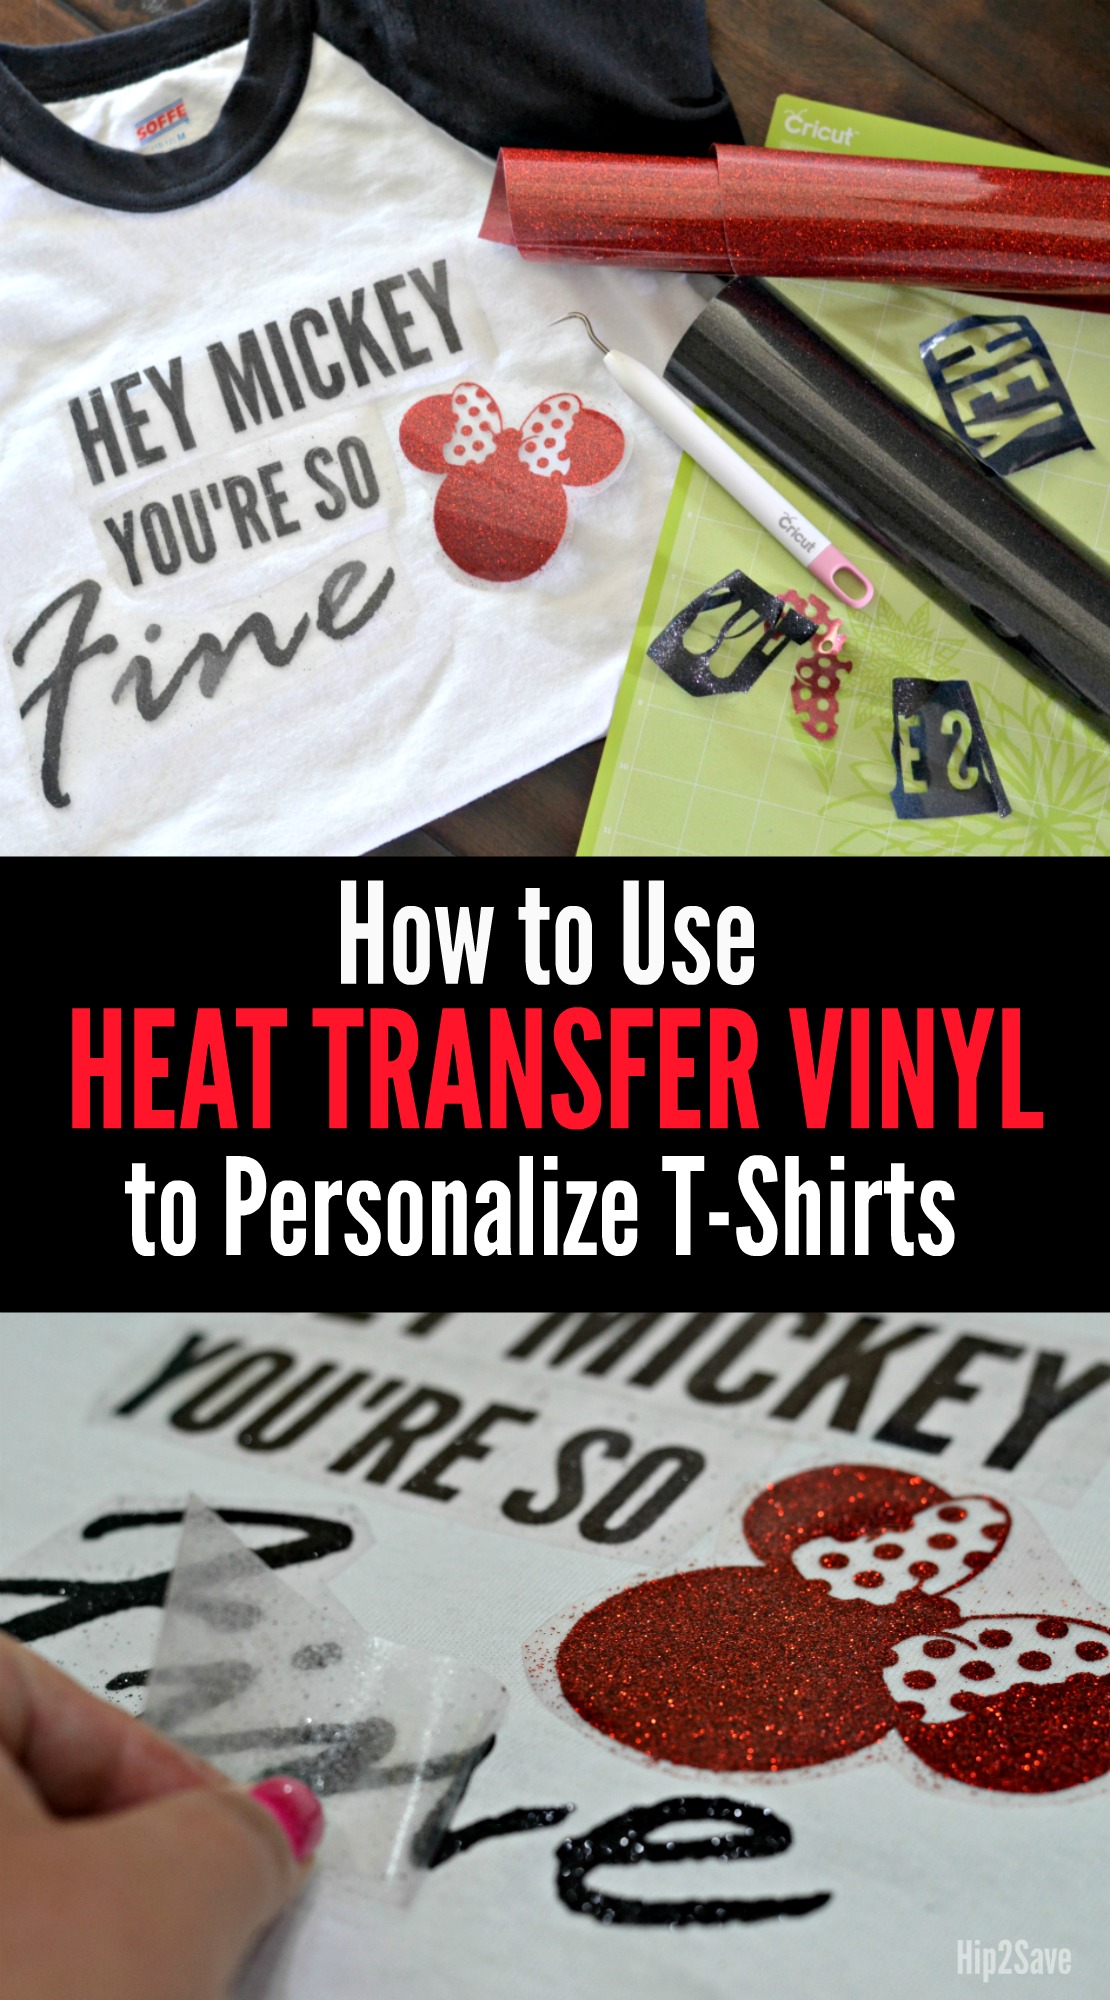
If you’re interested in making fun personalized shirts with your Cricut machine, no need to be intimidated by using Heat Transfer Vinyl in your projects. I’m still a Cricut Newbie and recently embellished a few creative t-shirts for my kids to wear on our trip to Disneyland!

Here are a few helpful tips on how to make shirts with Heat Transfer Vinyl using Cricut Design Space, which is the FREE online software used for designing and cutting your Cricut projects.
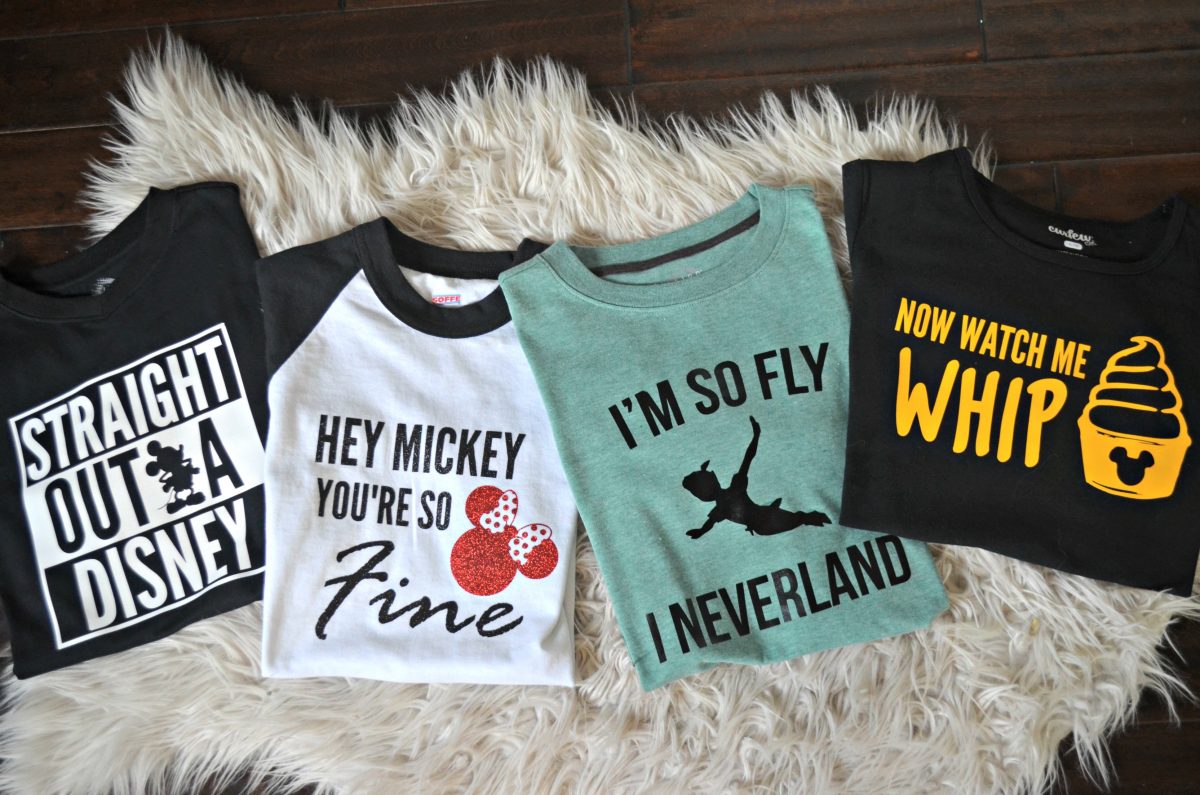
How to Use Heat Transfer Vinyl on T-Shirts
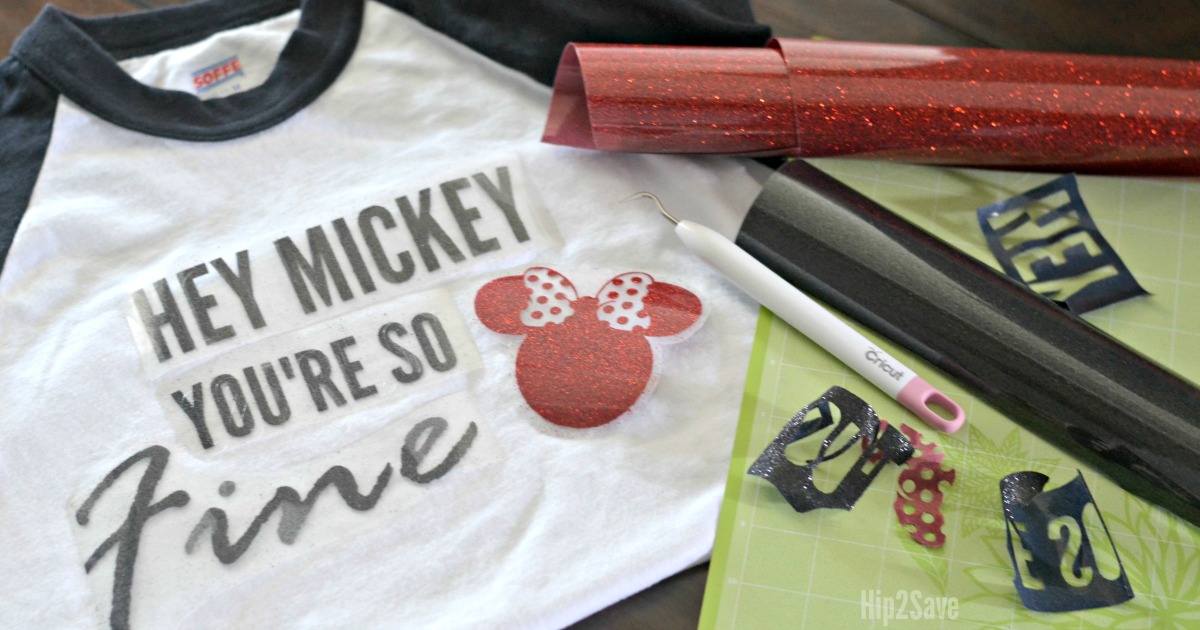
Supplies Needed:
-
- Heat Transfer Vinyl (I used Cricut brand Glitter HTV)
- Cricut machine
- Cricut Cutting Mat
- Weeding Tool
- Iron
- Pillow Case or Thin Cotton Cloth
Instructions:
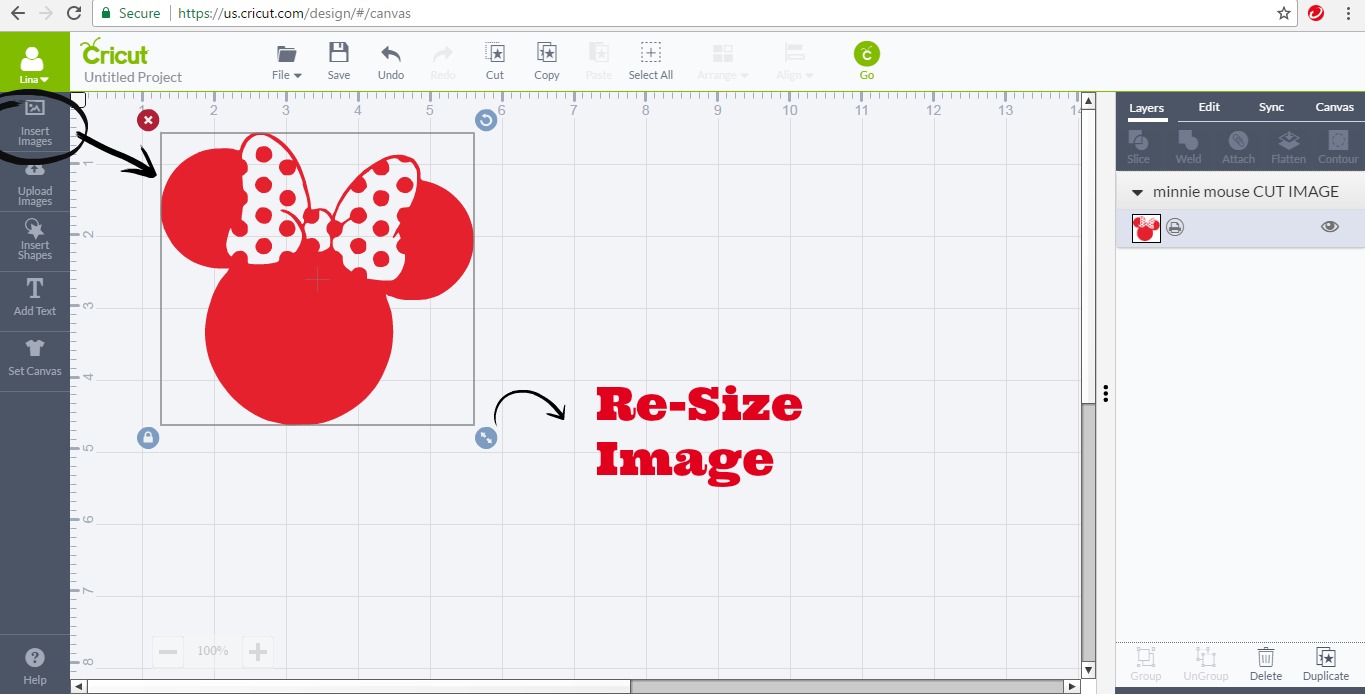
1. Insert Image to your project in Cricut Design Space and create the desired size by dragging the blue arrow circle towards the bottom right of the image.
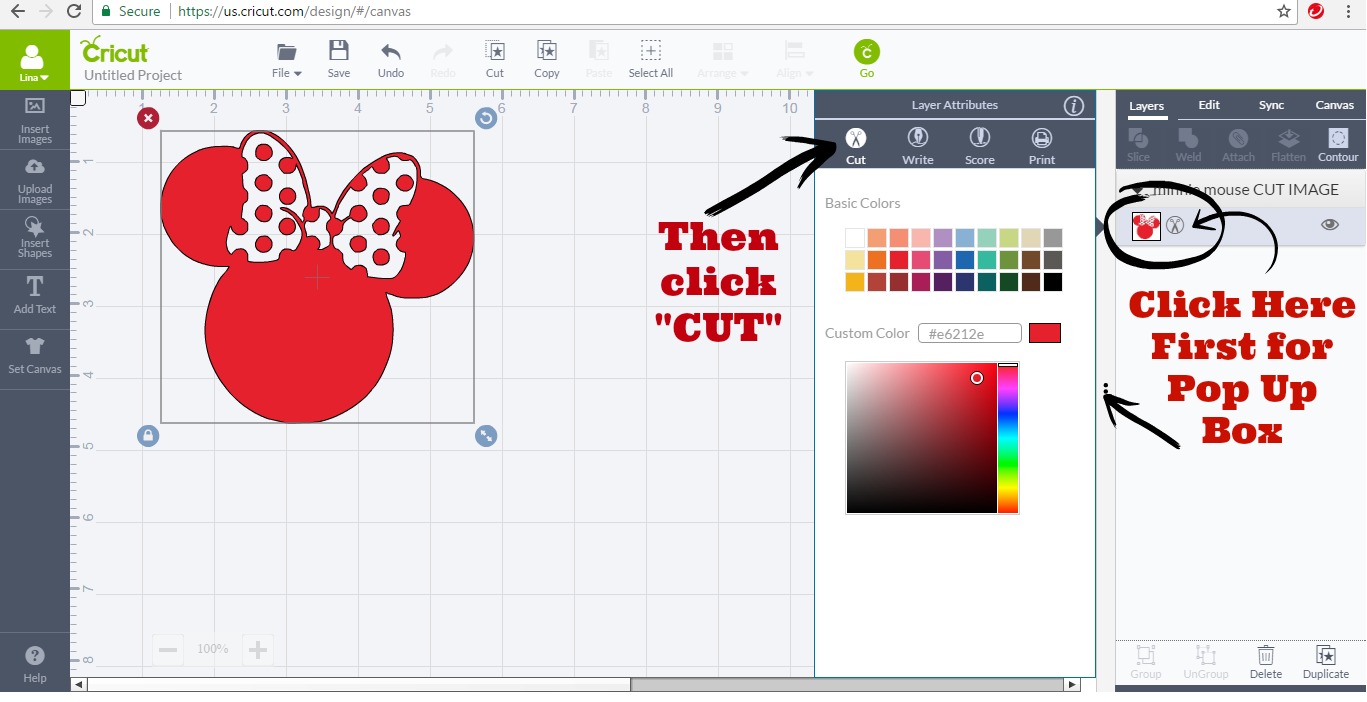
2. Change image from “Print” image to “Cut” image using the “Layer Attributes” box. Click the green “Go” circle on the top right of the screen.
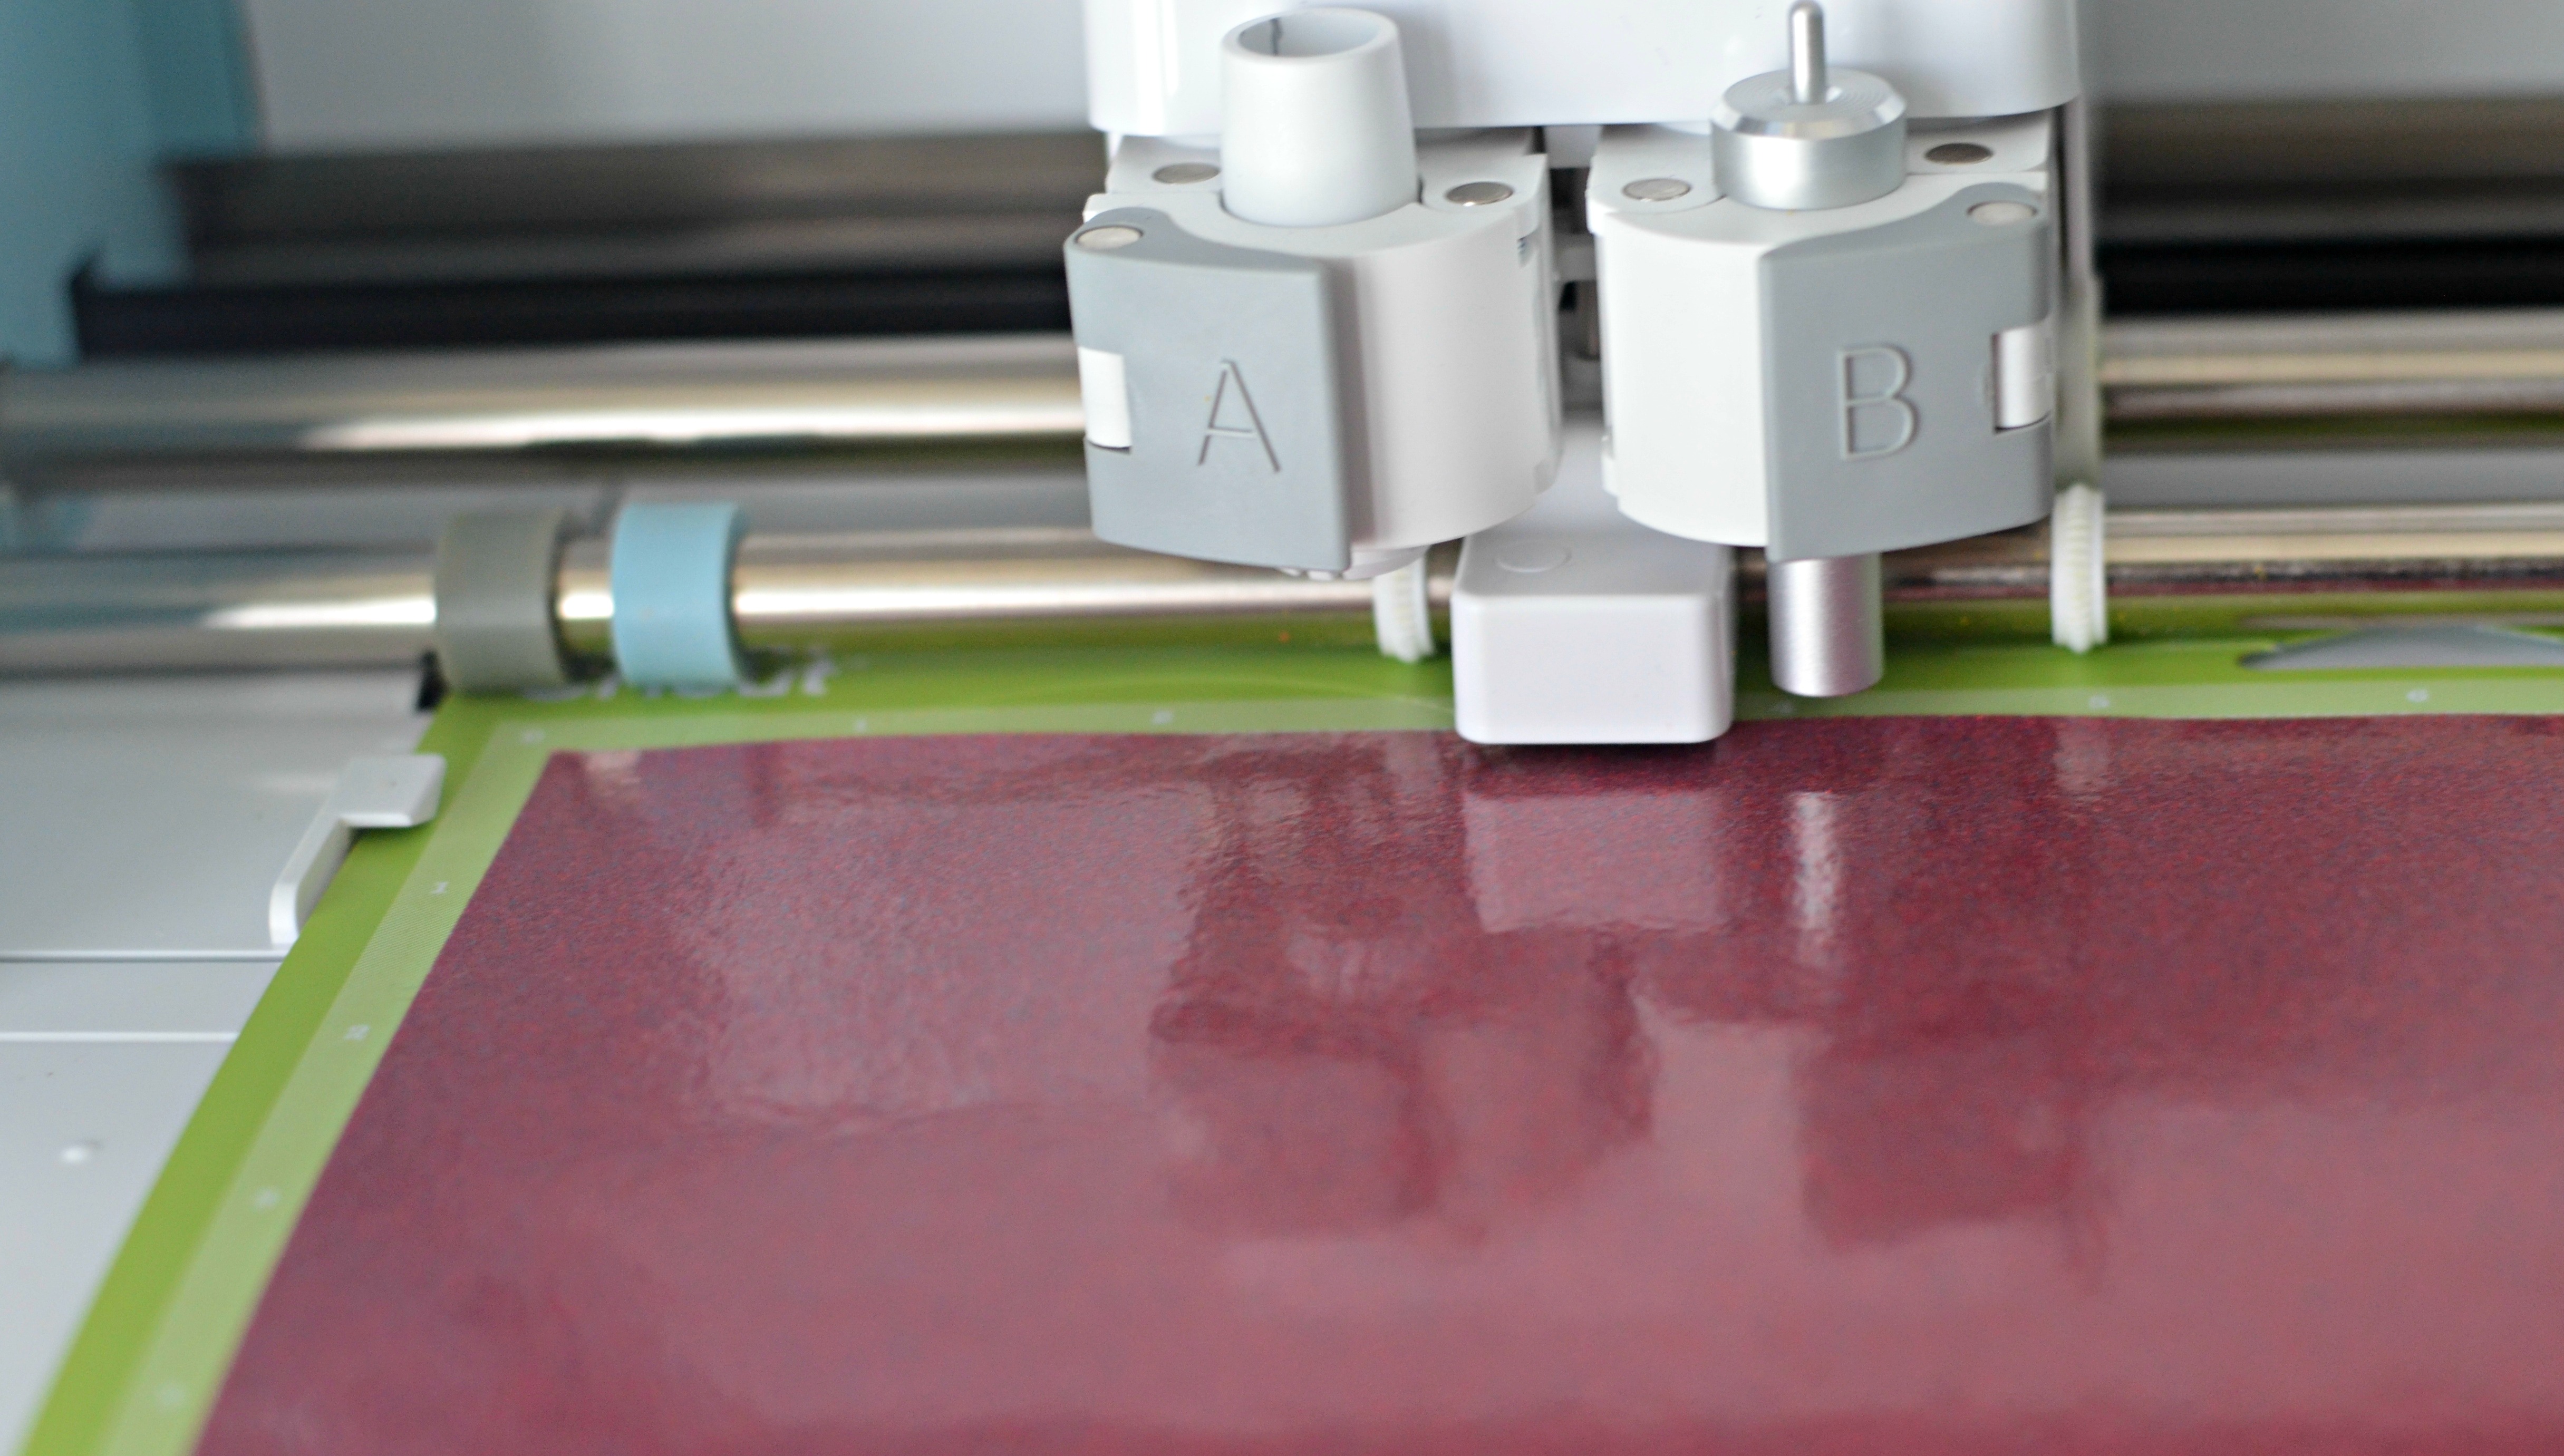
3. Load Heat Transfer Vinyl onto your Standard Grip Cricut Cutting Mat making sure the shiny side is down.
Tip: It’s harder to tell with glitter, so I like to visually check by peeling a very small corner with my nail to see exactly which part is the shiny clear liner vs. the actual dull looking color vinyl layer.
You want the machine to be cutting the vinyl layer so make sure it’s facing up and shiny clear layer faces down. This is very important to avoid wasting a bunch of vinyl as I did! Yikes!
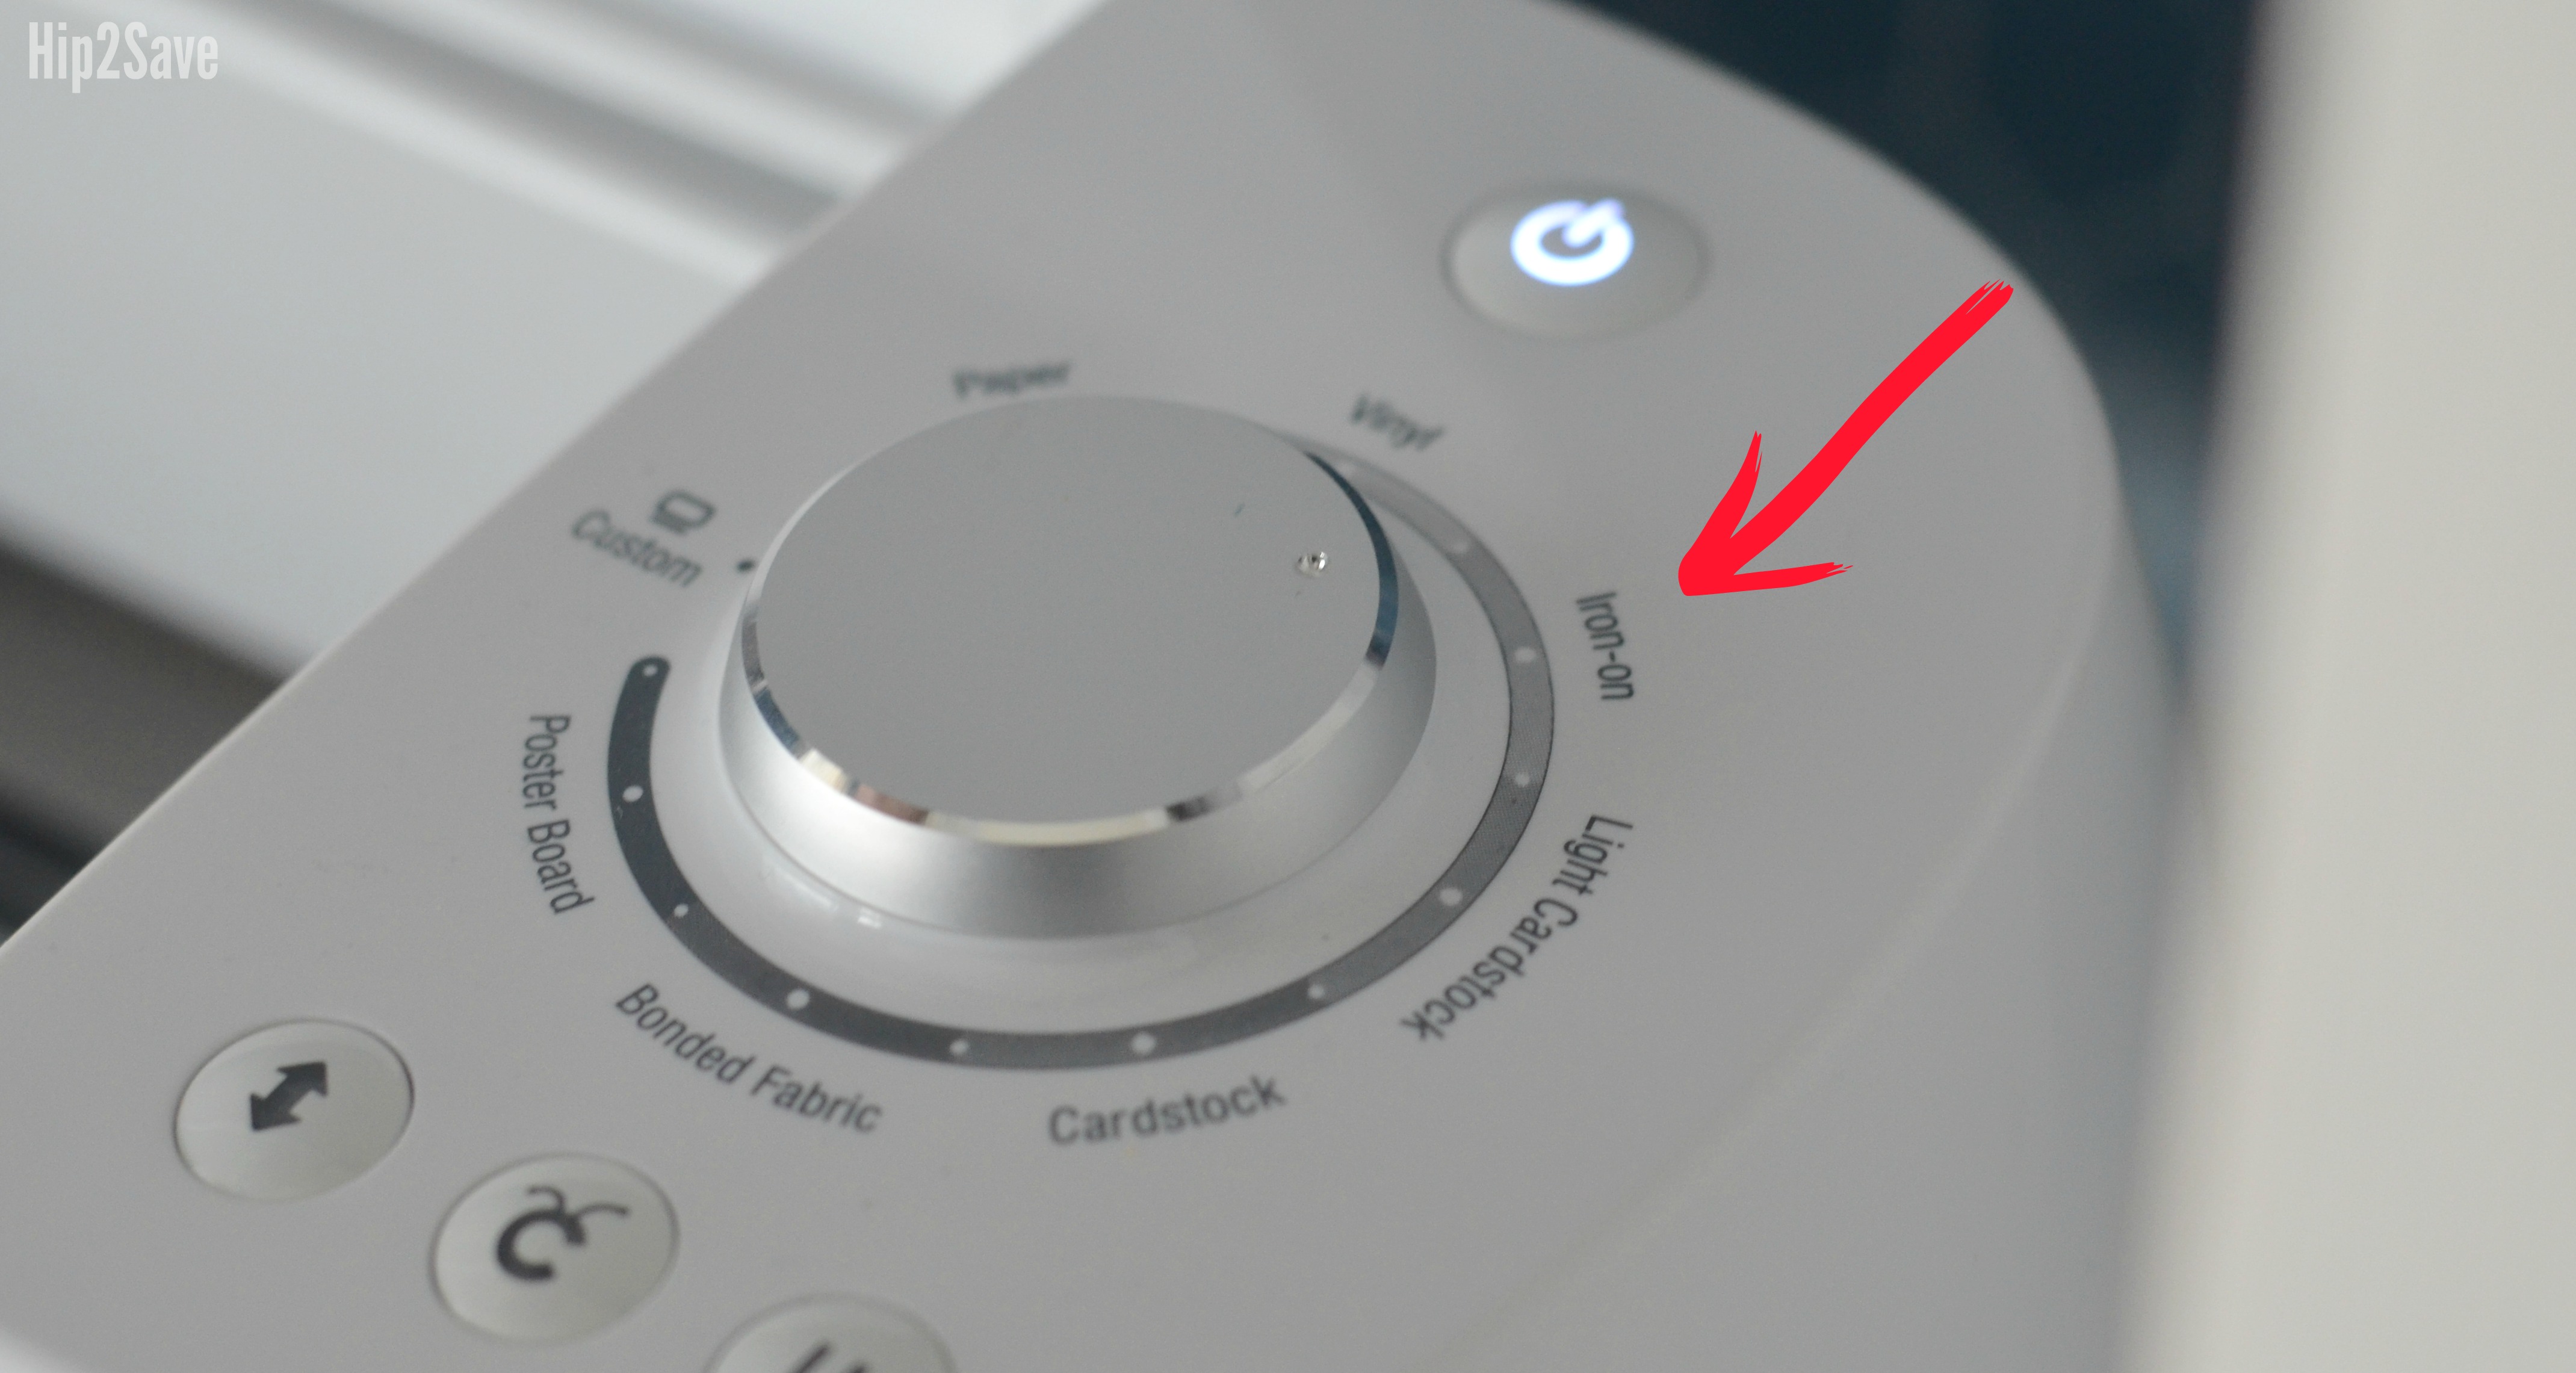
4. Set dial on the machine to “Iron-On” setting. This will make sure your Cricut onlinepletes a “Kiss Cut” by only cutting through the top vinyl layer.
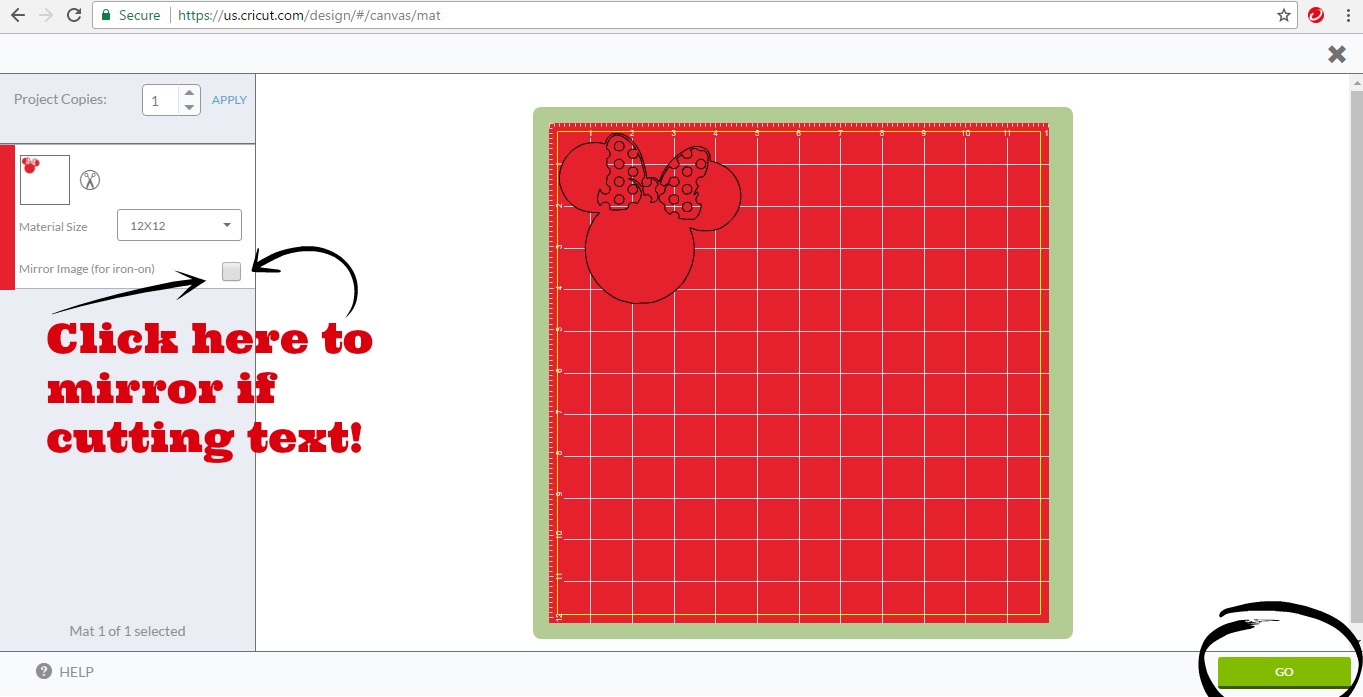
5. Back in Cricut Design Space, click the box to mirror image—this is a must with iron-on projects with text and most images. Press “GO” and follow prompts on machine to LOAD mat and make final cut.
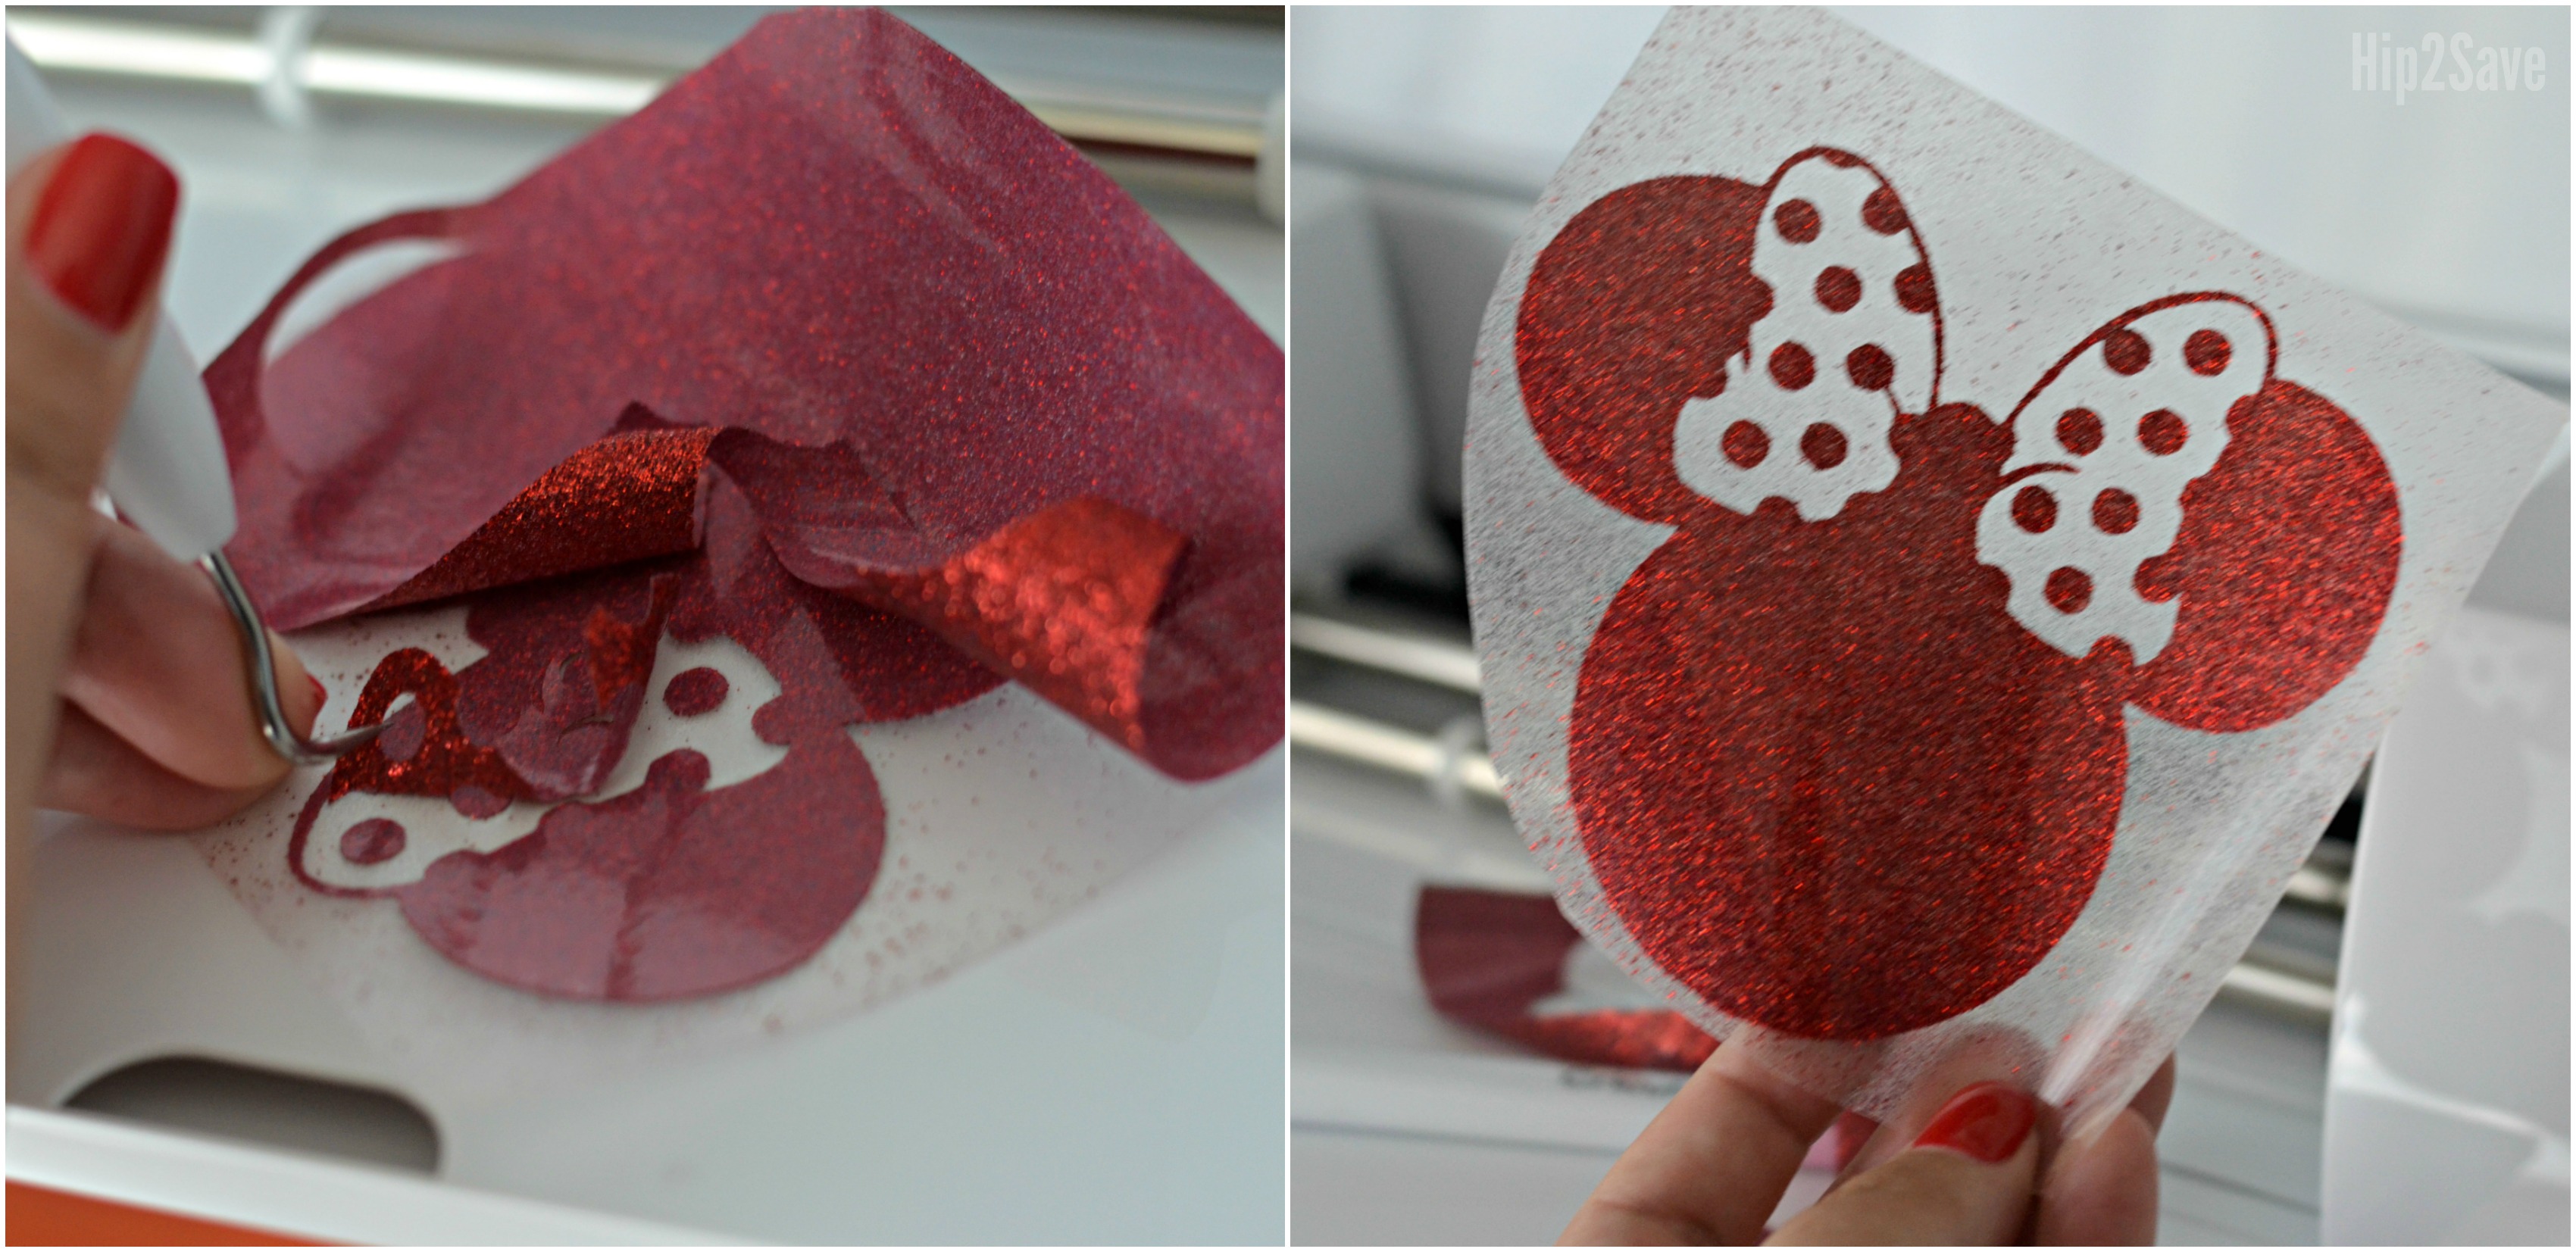
6) Unload mat and carefully cut around your image so you can save the uncut portion of vinyl for future projects. Use a weeding tool to peel off excess vinyl and reveal your iron-on design.
Tip: Hold next to a window or light so you can easily see the cut lines if needed.
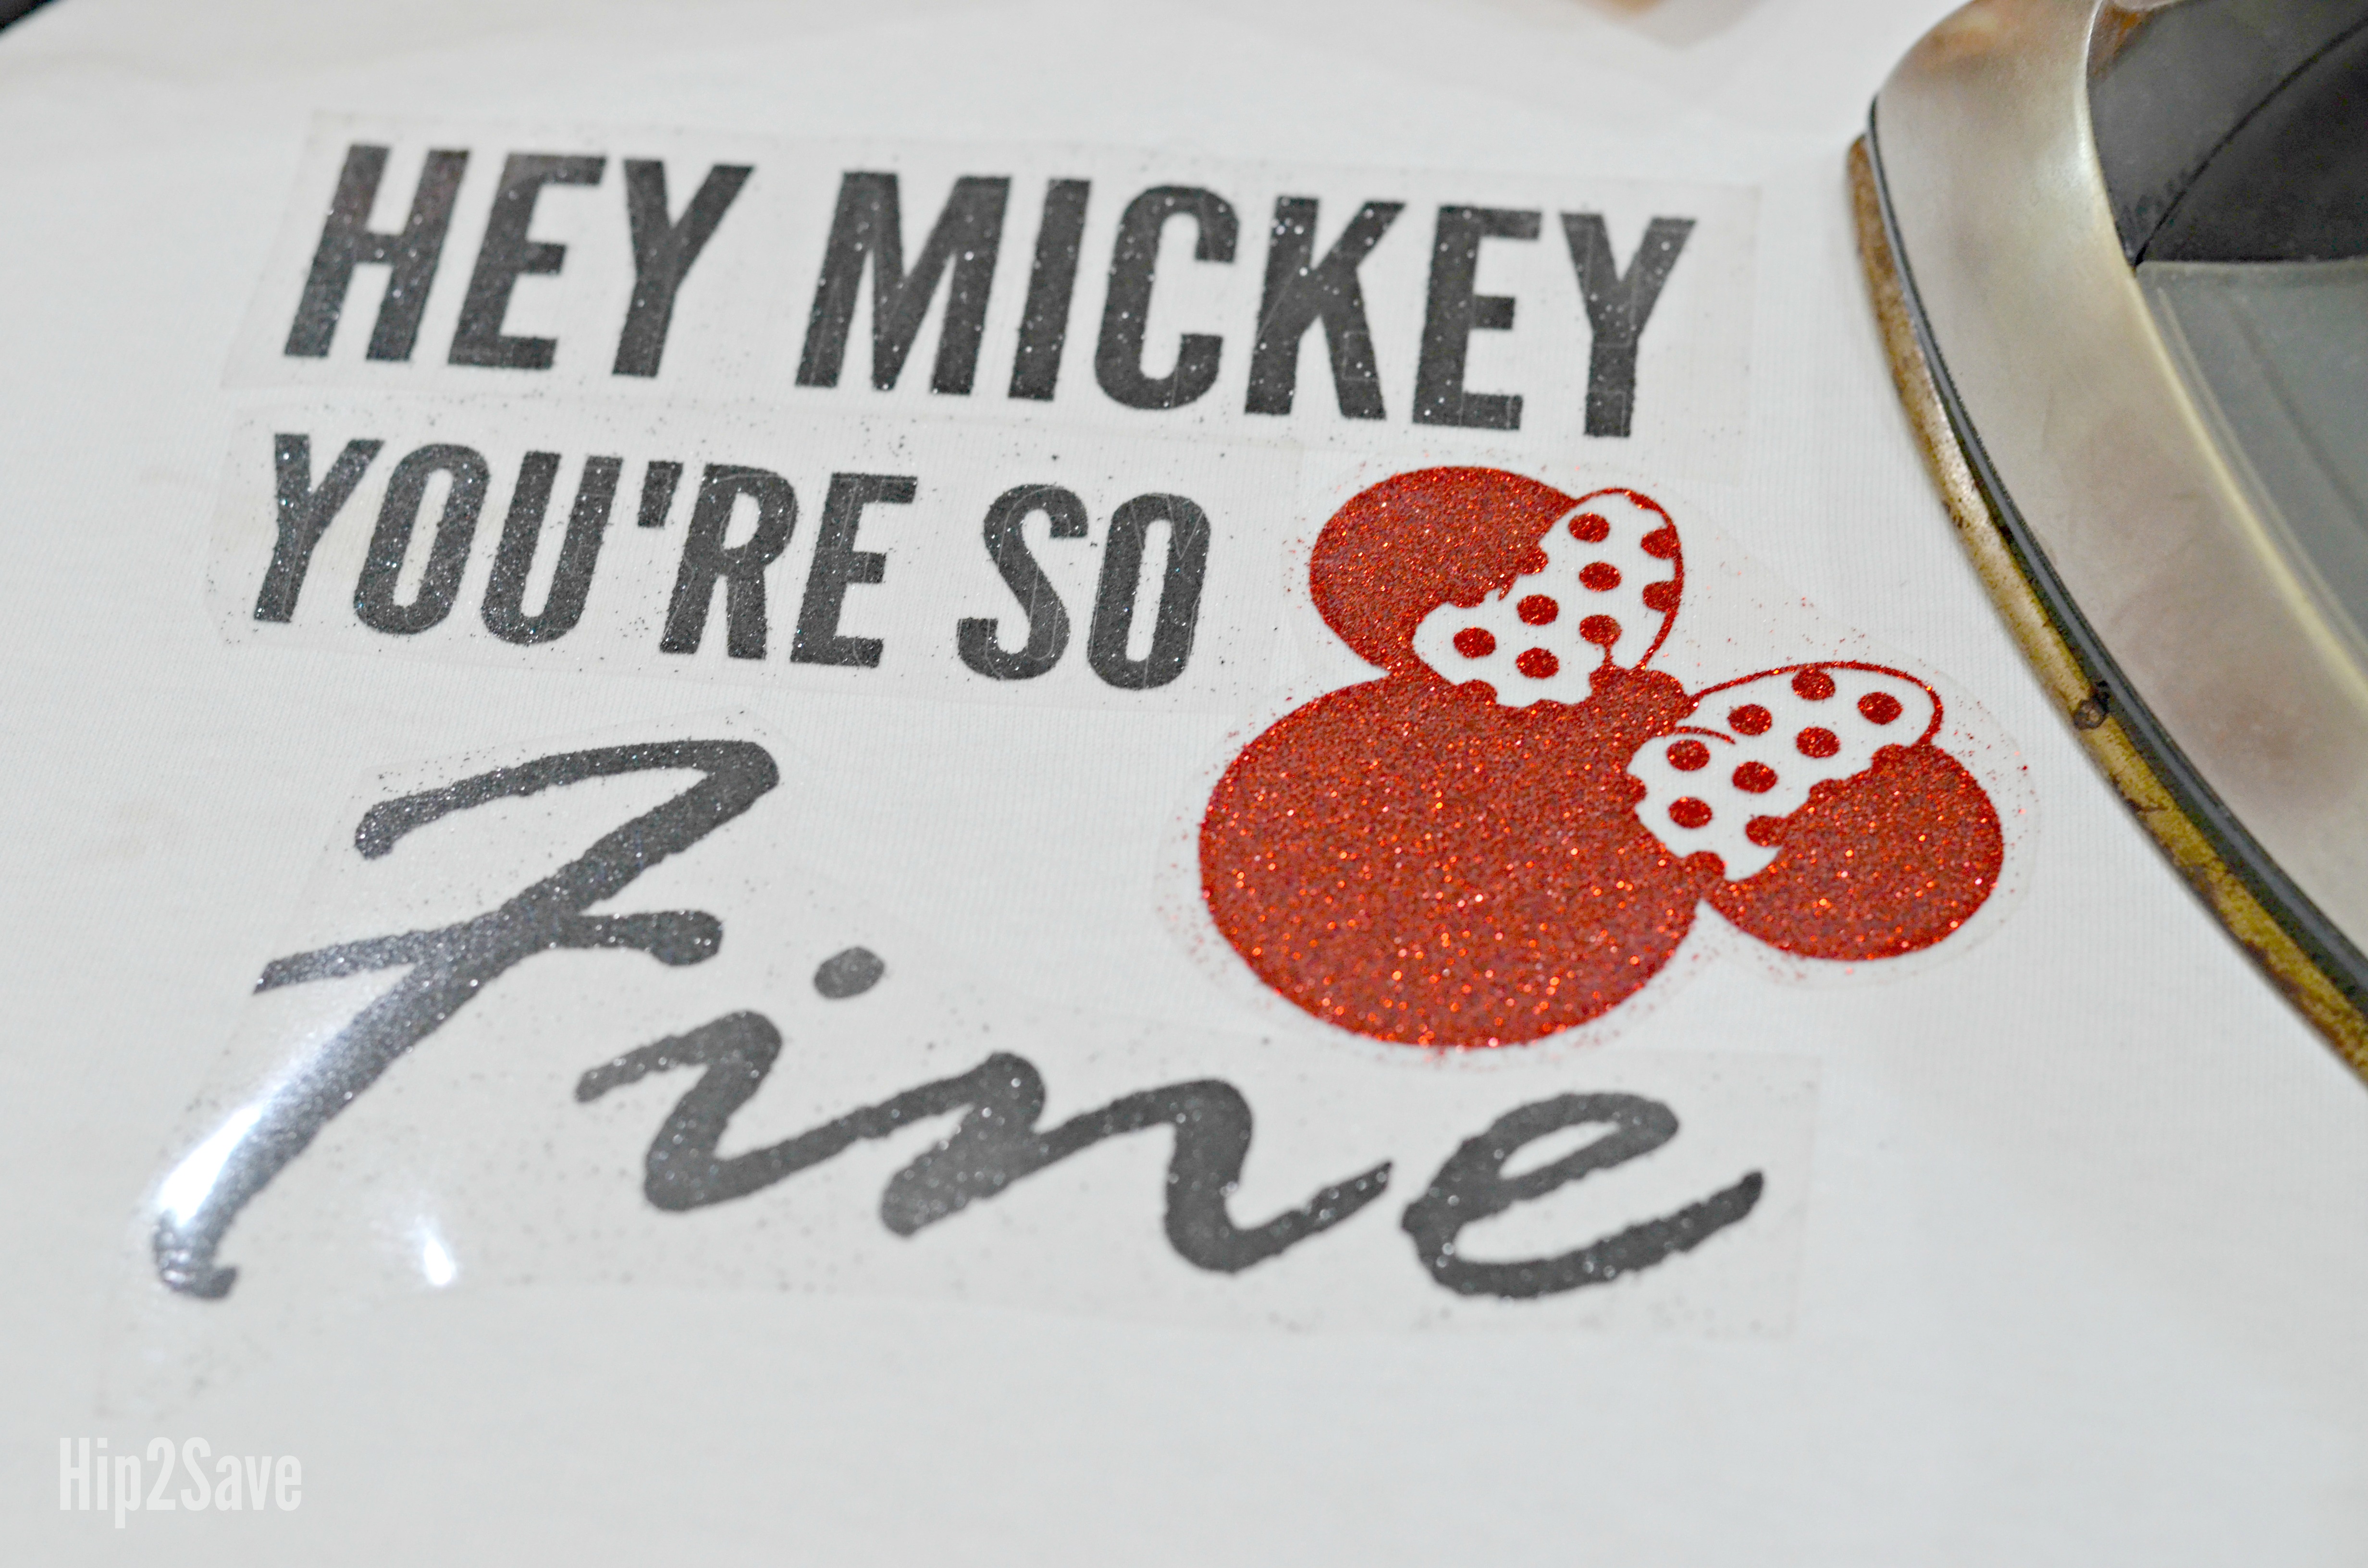
7. Heat iron to the hottest setting and pre-heat shirt with it before placing vinyl down on shirt, shiny side up and vinyl side touching shirt (make sure steam setting is OFF).
Place a pillowcase or thin cloth on top of the design as a press cloth. Press iron down over cloth using medium pressure for about 30 seconds. Turn the shirt over and press the iron down for another 30 seconds.

8. Let cool for a minute and remove the clear film. If there is lifting, place film back on and iron again for another 10 seconds. For best results, wash shirts inside out.
Where can I get fonts & images to use for personal use?
Fonts-
Cricut Design Space has access to some free fonts and also some available to purchase. The fonts on your onlineputer load automatically in Design Space so if you’re like me and collect fonts all the time, it’s helpful to work with the ones I already like. Dafont.online is one resource I’ve used for free fonts.
Images-
Cricut Design Space also has access to some free images and some available for purchase. You can also upload .JPG images in Design Space and edit it into an .SVG “cut” file. Click HERE for specific instructions on how to do that.
Once you upload an image to Design Space it will be saved in your account for future use. You can search online for free clip art to upload to Design Space and also join image sharing groups.
Try joining the Facebook group “Cricut Newbies & Pros for Explore” to see what others are making and have access to a large list of files to use on projects.
