DIY Shamrock T-Shirt (St. Patrick’s Day Craft)
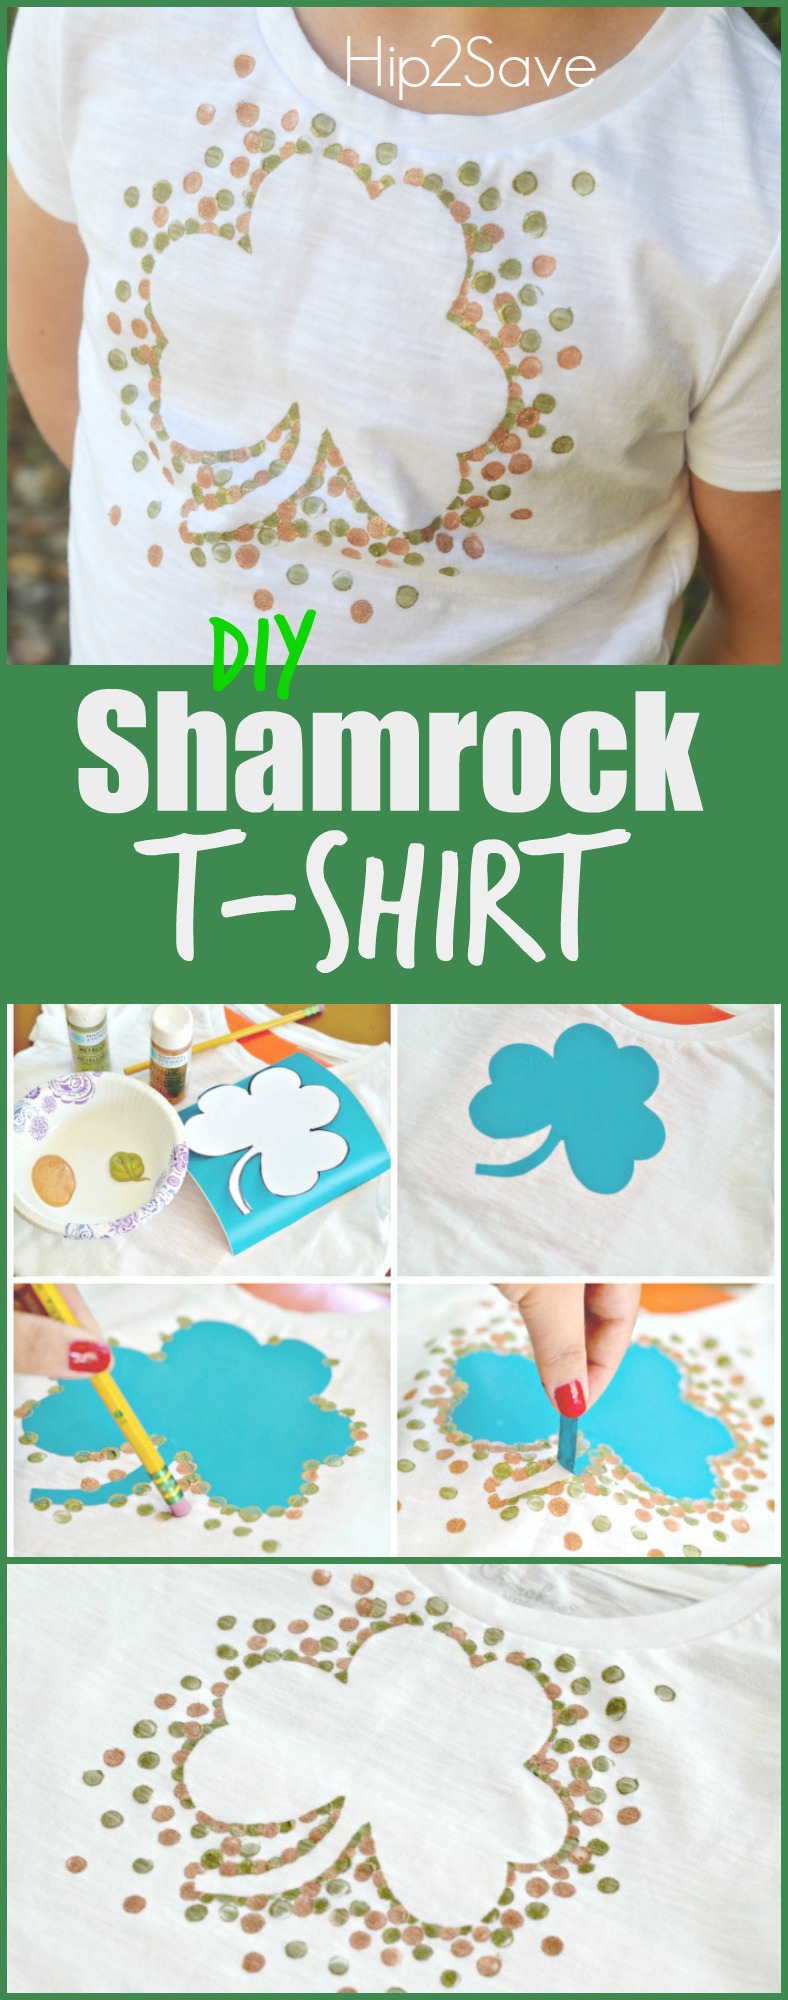
If you’re interested in making a festive t-shirt for you or your kiddos to wear on St. Patrick’s Day, check out this easy idea! All you need is a pencil eraser and fabric paint to stamp a shamrock shape on clothing – it’s fun and simple for all ages!
DIY Shamrock T-Shirt
Supplies Needed:
- Solid Cotton T-Shirt or Onesie
- Pencil with new Eraser
- Fabric Acrylic Paints (I used Martha Stewart Multi-Surface Craft Paint in Copper & Citrine Gold)
- Craft Vinyl and Shamrock Shape template
- Scrap piece of cardboard (to avoid paint bleeding)

Directions:
- Place cardboard inside shirt and lay flat.
- Figure out how large you’d like your shamrock shape to be and print/cut it out (use the clipart template found here and resize to your liking on your onlineputer or use google to find a free shamrock template).
- Trace shape and cut it out on a piece of craft vinyl.
- Remove backing from vinyl and stick onto shirt.
- Using the tip of a new pencil eraser, stamp craft paint around the edges of the shamrock shape – I found that 2-3 colors of paint work best.
- It also looks best to have lots of paint dots around the edges and then less paint dots as you move farther away from the shape.
- When done, pull off vinyl and discard. Let dry.
Notes: Don’t forget to wash and dry your new article of clothing first. Also, I chose to use a scrap piece of craft vinyl that I had on hand which is basically like a large adhesive sticker. You could also use a piece of adhesive shelf liner paper or even a piece of freezer paper. Another option is to tape a piece of wax paper and then go back and add to the small areas covered by the tape.
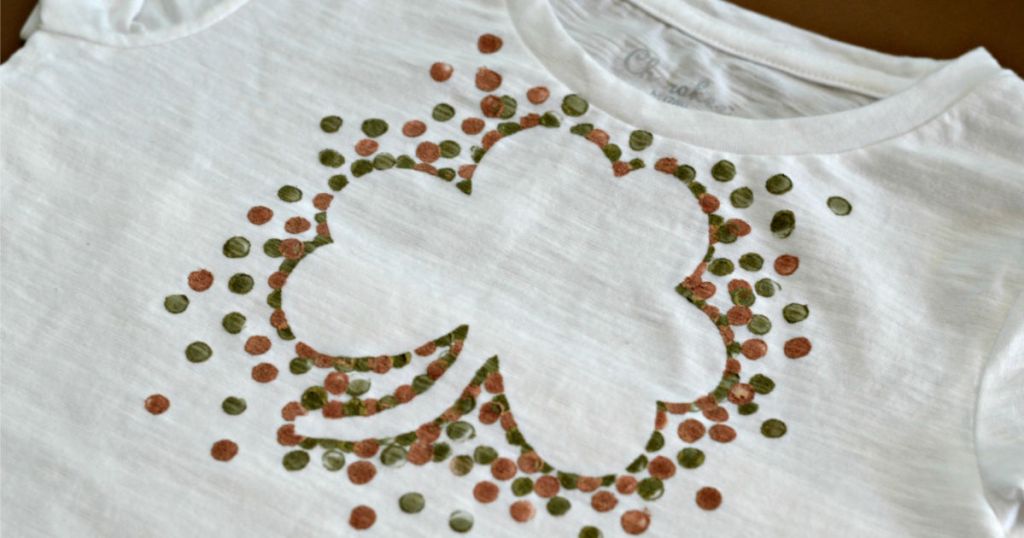
 I love how this project turned out! Use this same idea on a shirt for Easter by using a bunny shape, one for Disney by using a Mickey ear shape, or even a birthday shirt by using a number shape. So many possibilities!