Paper Clip Jewelry (Fun Summer Break Craft)

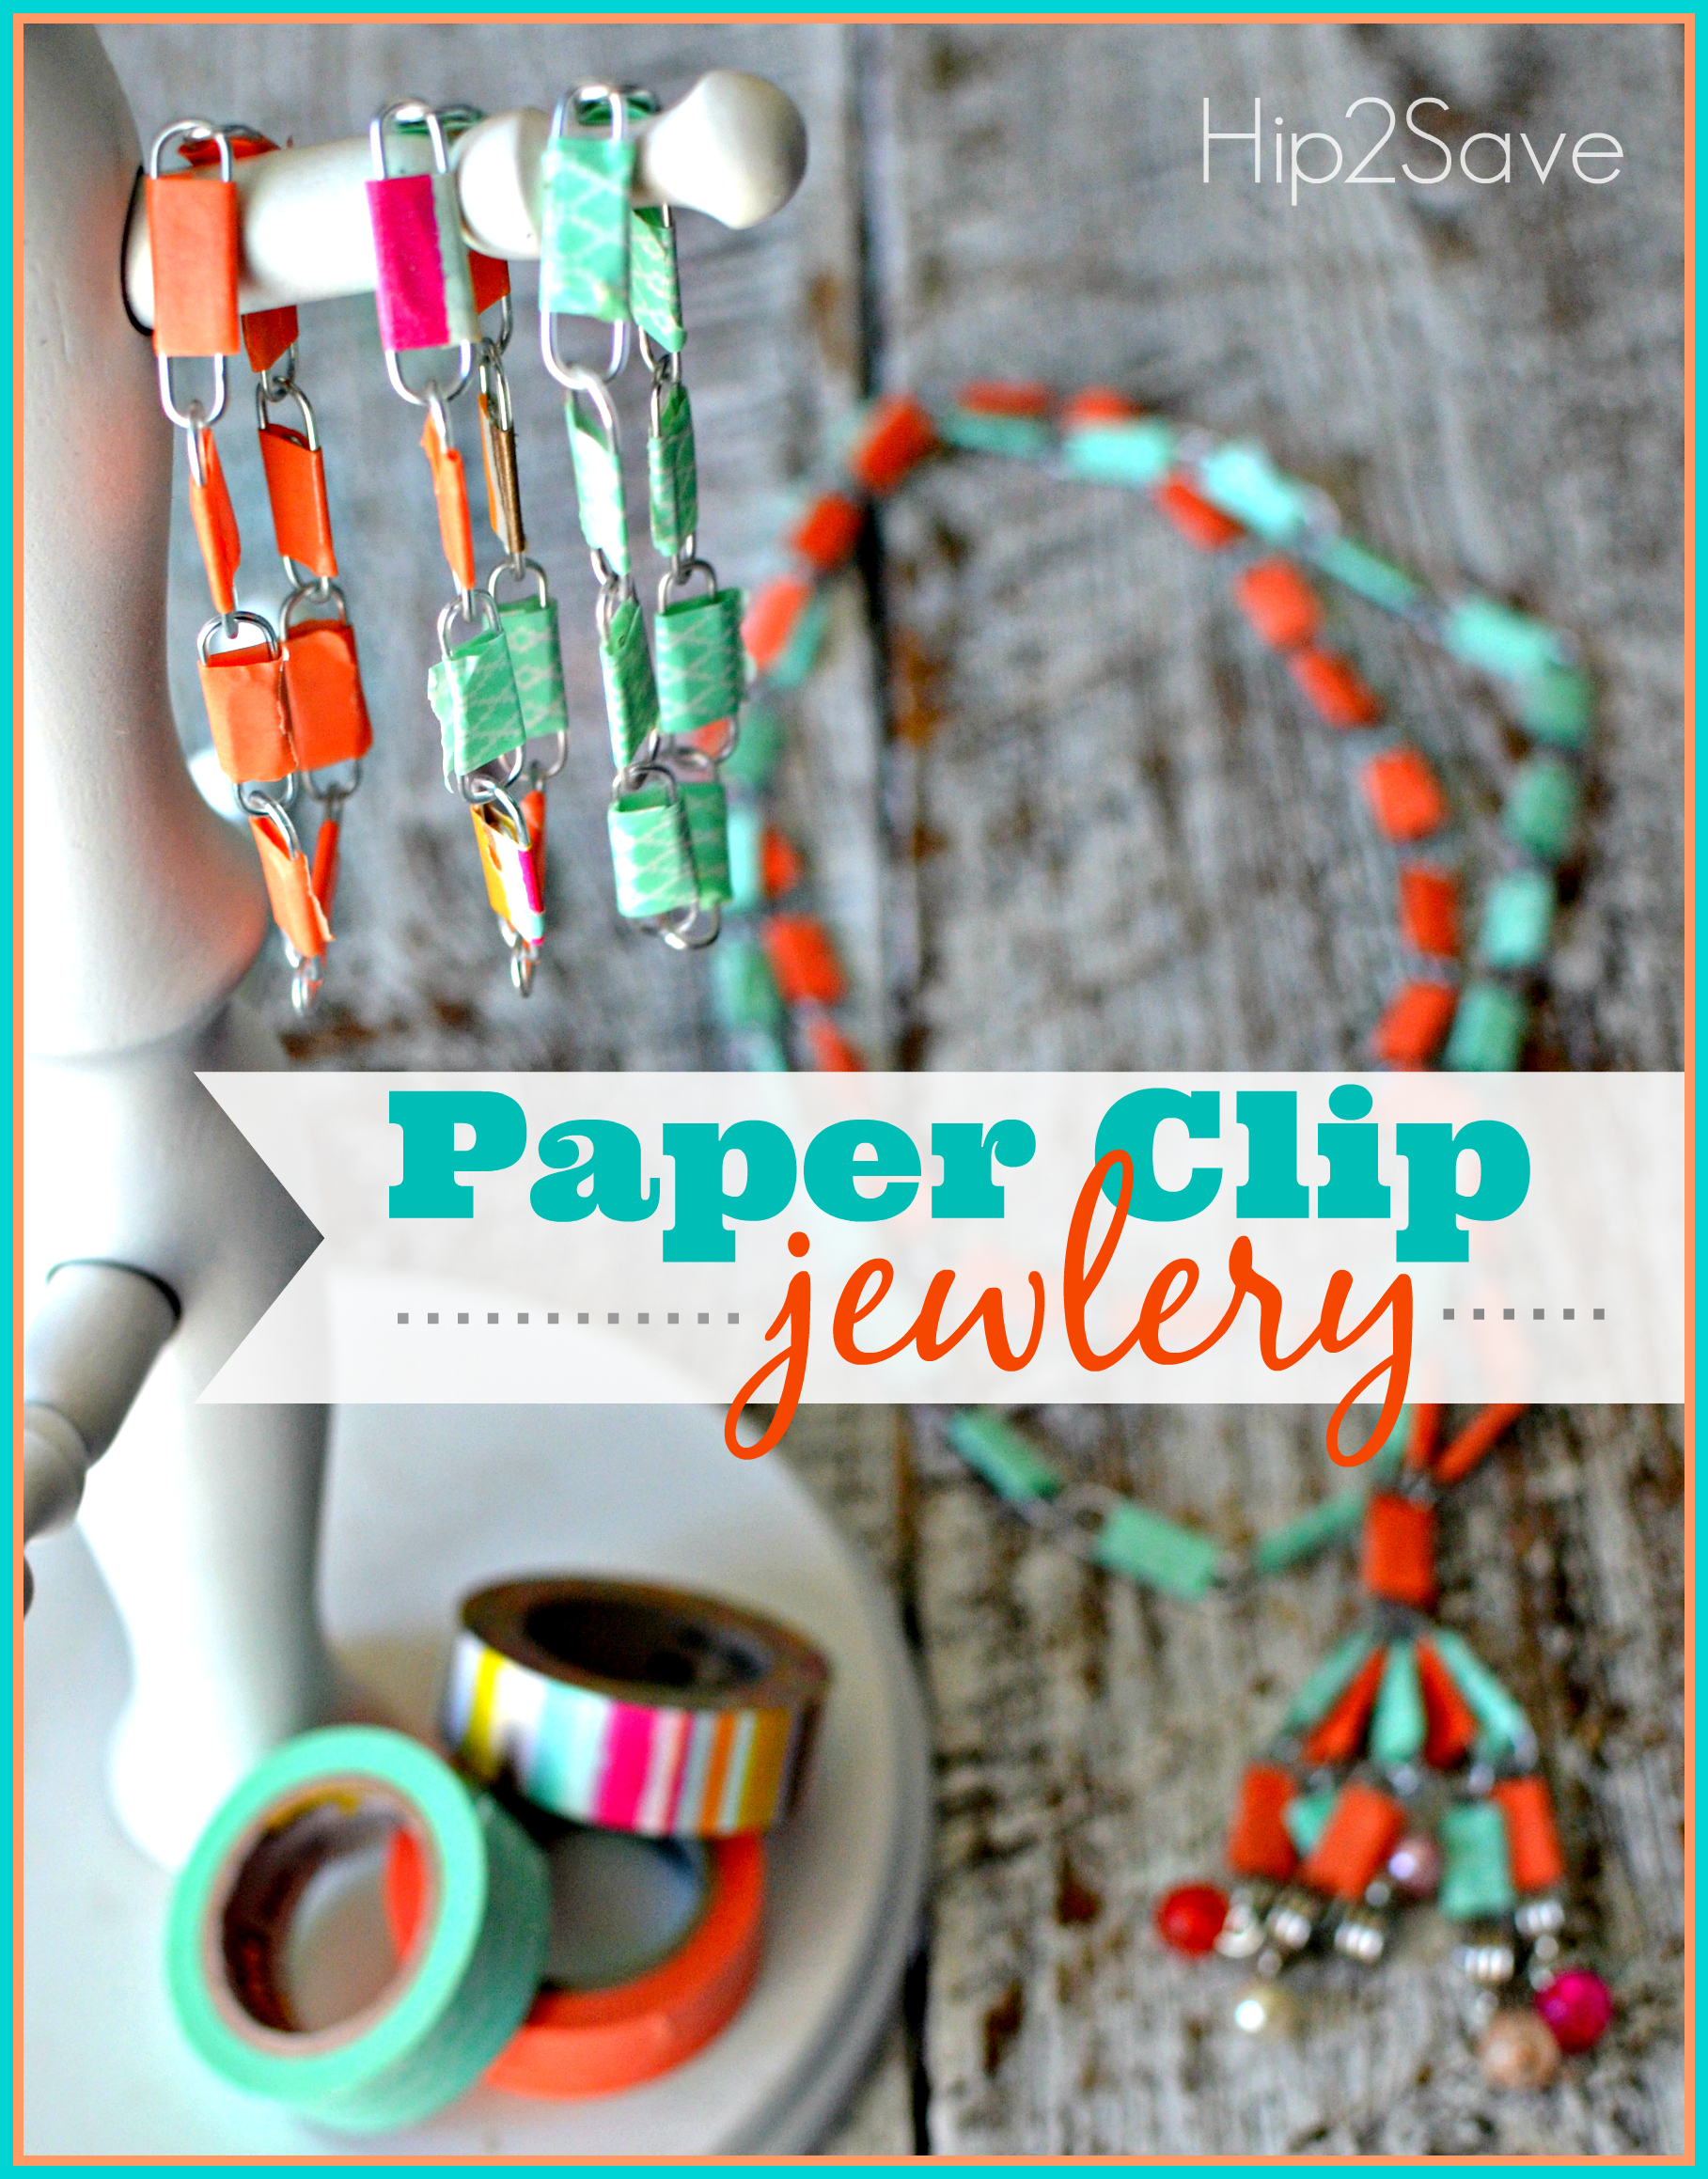
If you’re looking for an easy craft to add to your summer fun list, check out this super cute and fun to make DIY jewelry using paper clips and craft tape. It’s simple enough for kids and I guarantee you’ll want to join in too! Get creative with different colored and patterned tape found in most craft stores.
Better yet, you can find most of these items at your local Dollar Tree, making it a frugal idea too!
DIY Paper Clip Jewelry
For this craft you’ll need:
- Paper Clips
- Washi Tape or Duct Tape (pictured tape is from Target’s craft section)
- Optional Beads or Small Pendants
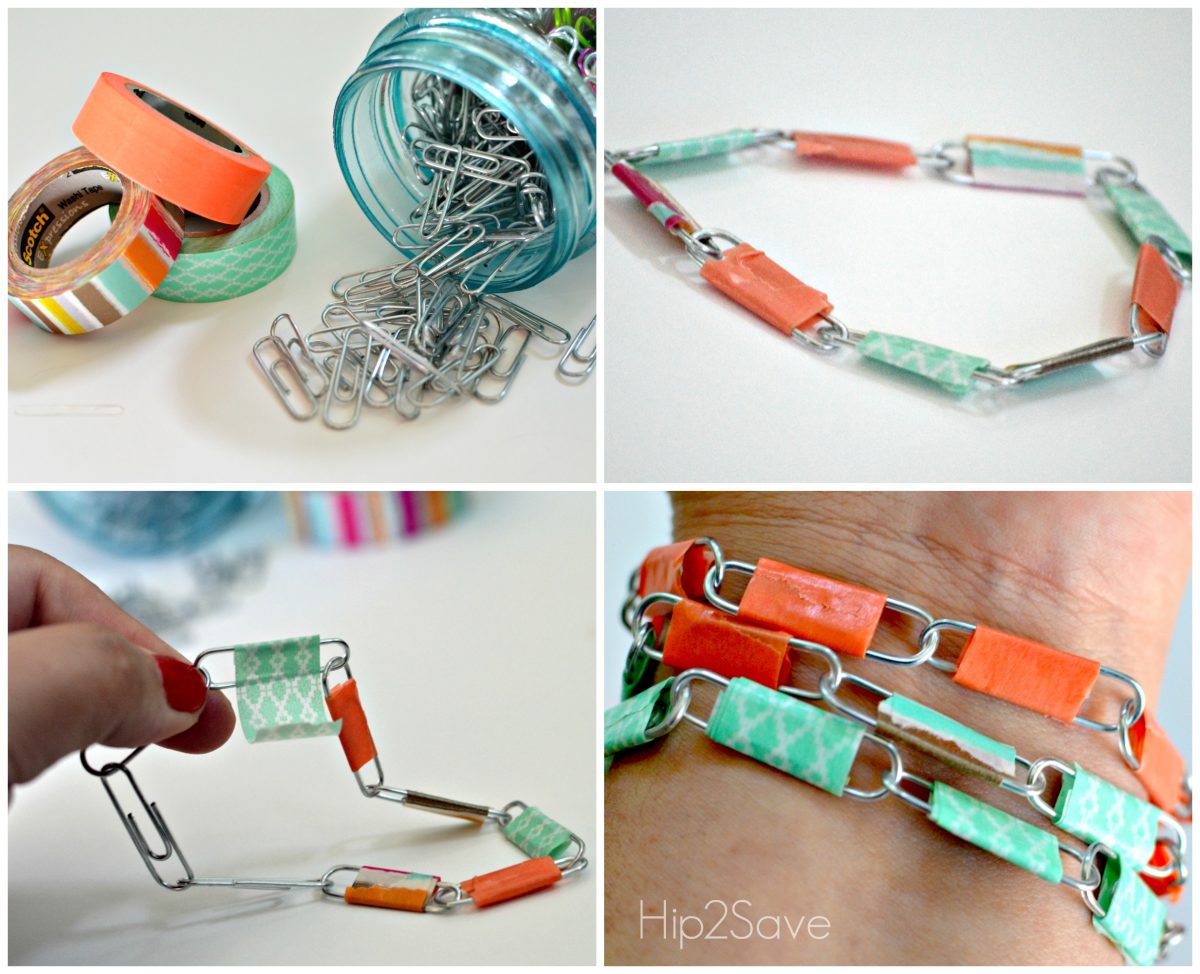
Directions: Plan out how long you want your bracelet or necklace to be and hook paper clips together. Tear off an inch or so of tape and wrap it around the middle of each paper clip. Press down to seal tape with your finger at the edges so it won’t unravel. That’s it – easy peasy!
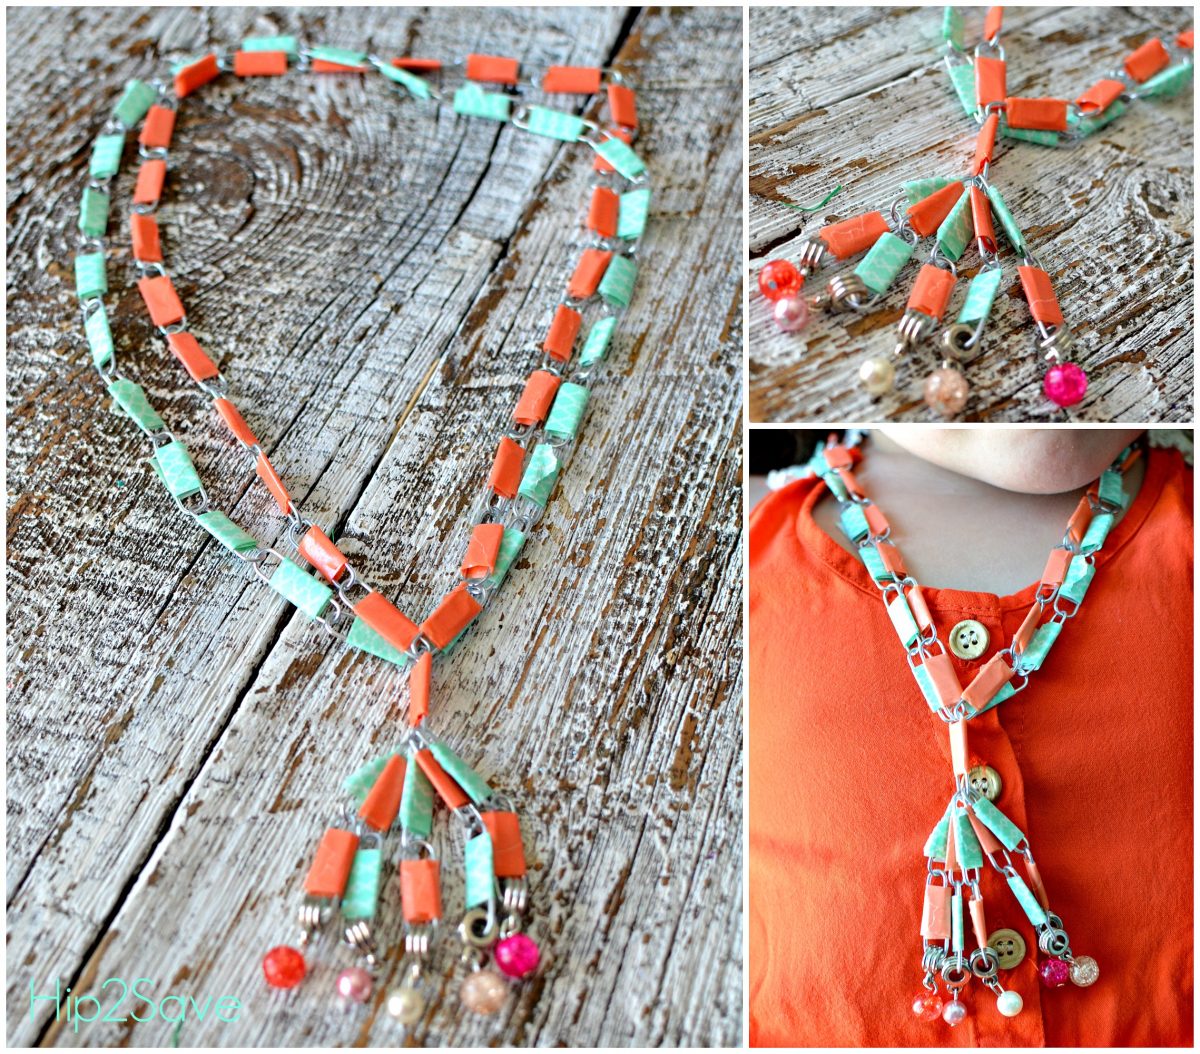
If you want more of a challenge, try creating the double necklace pictured above – made with hanging paper clips and beads at the end. To make this necklace, create two strands of 24 paper clips each (or enough to fit over your head) and attach the ends to the top of one vertical paper clip. Then to the bottom of that same paper clip, attach five strands of two paper clips each. Before taping, attach five beads from the craft store to each end.
My kids and I loved both this craft! If you’re working with boys, you can definitely include more masculine colors! This is a great craft for summer camps, scouts, or simply an afternoon at home. This idea was inspired by the photos from How About Orange.
Looking for more easy craft ideas for the kids? Try out craft stick bracelets.

